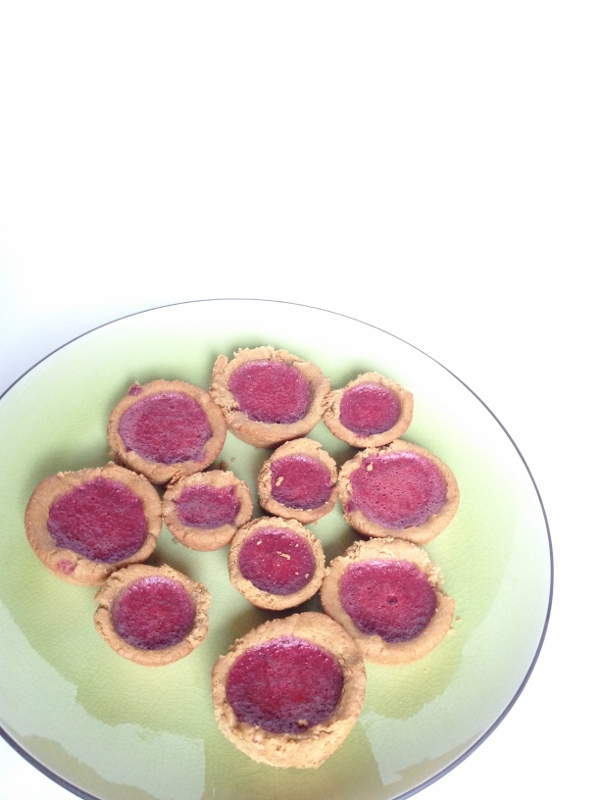
 I love little people birthdays. My niece recently had her seventh birthday and instead of buying her something she didn’t need, wouldn’t use, or not like, I decided to bake her something. Now, she used to be in love with peanut butter and that used to be all she wanted to eat – now she likes it fine, but loves anything sugary more. So I decided to bake her these not-to-sweet, vegan and gluten-free, Jelly Filled Peanut Butter Cookies.

~~
~~
~~
These cookies were on the high side of my difficulty rating. They were not difficult to make or too intensive, but baking cookies in mini-muffin tins is not the easiest thing in the world. Especially when you are not wanting them to rise too much. A normal peanut butter cookie usually stays flat and is semi-crunchy. I happen to have made fluffy and fragile pb cookies. Tasty and oh-so-good, but again with the difficult rating, because I put more effort into getting them to be just right!
~
~
~
~
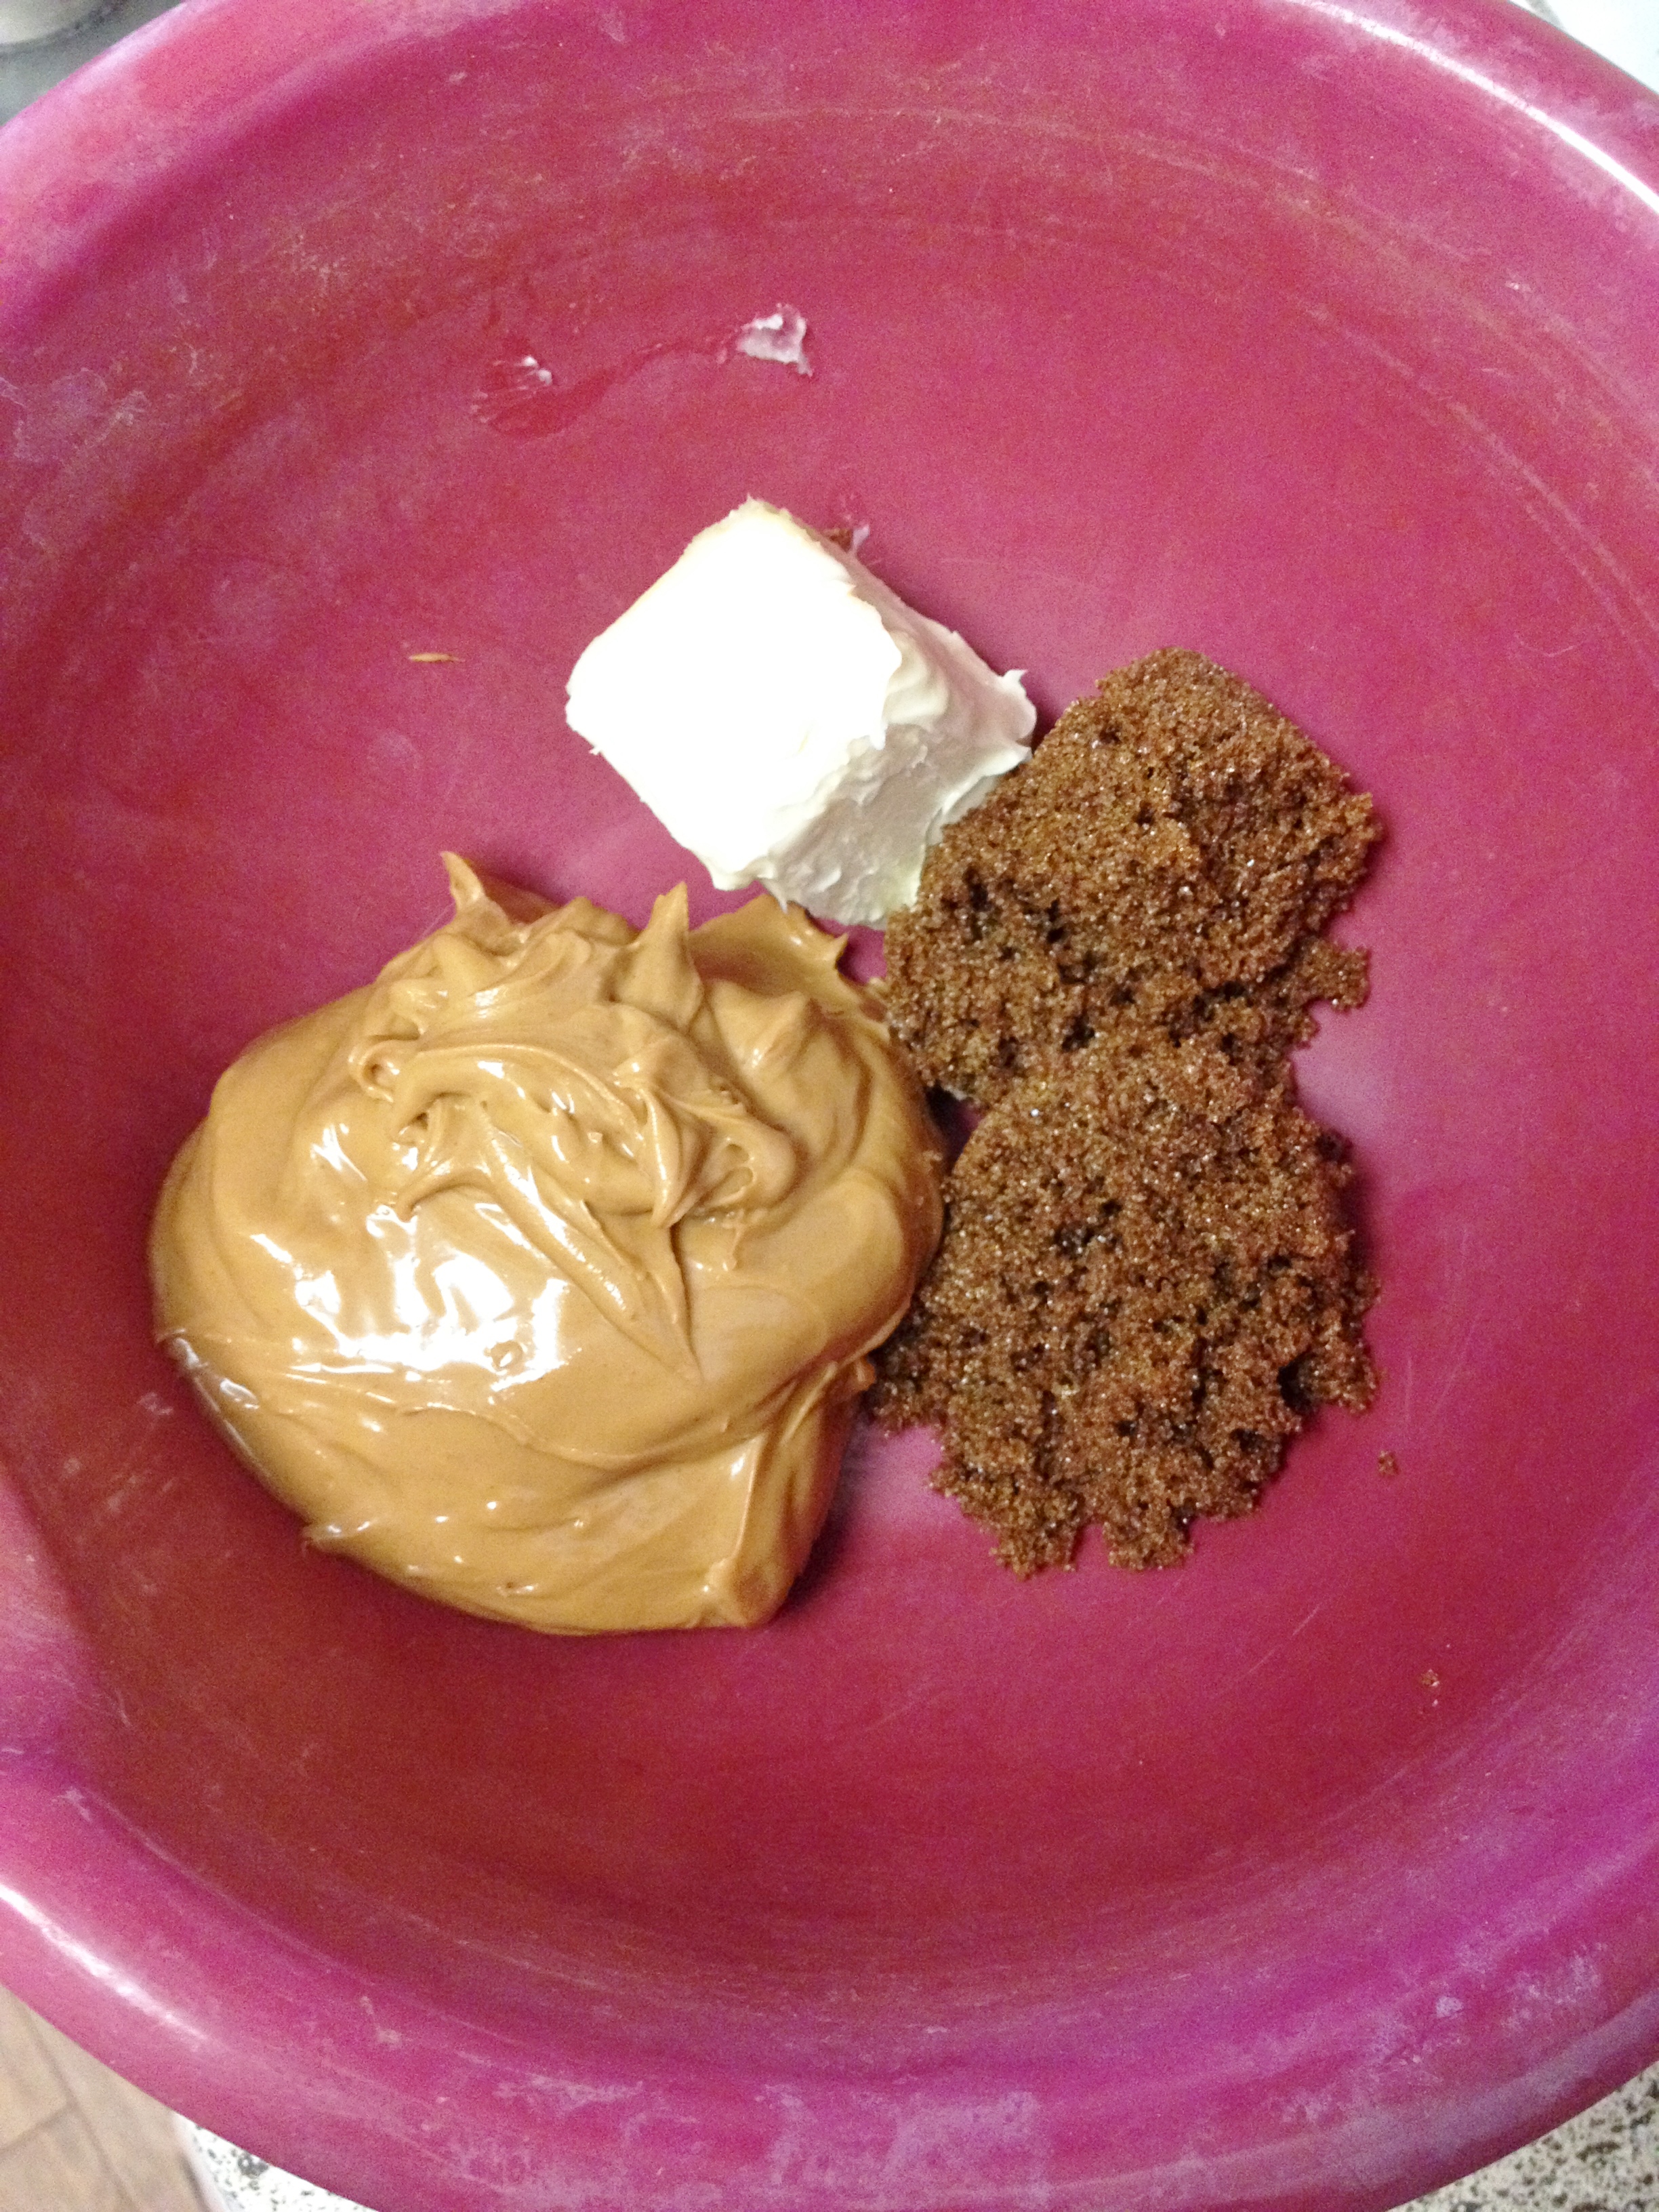
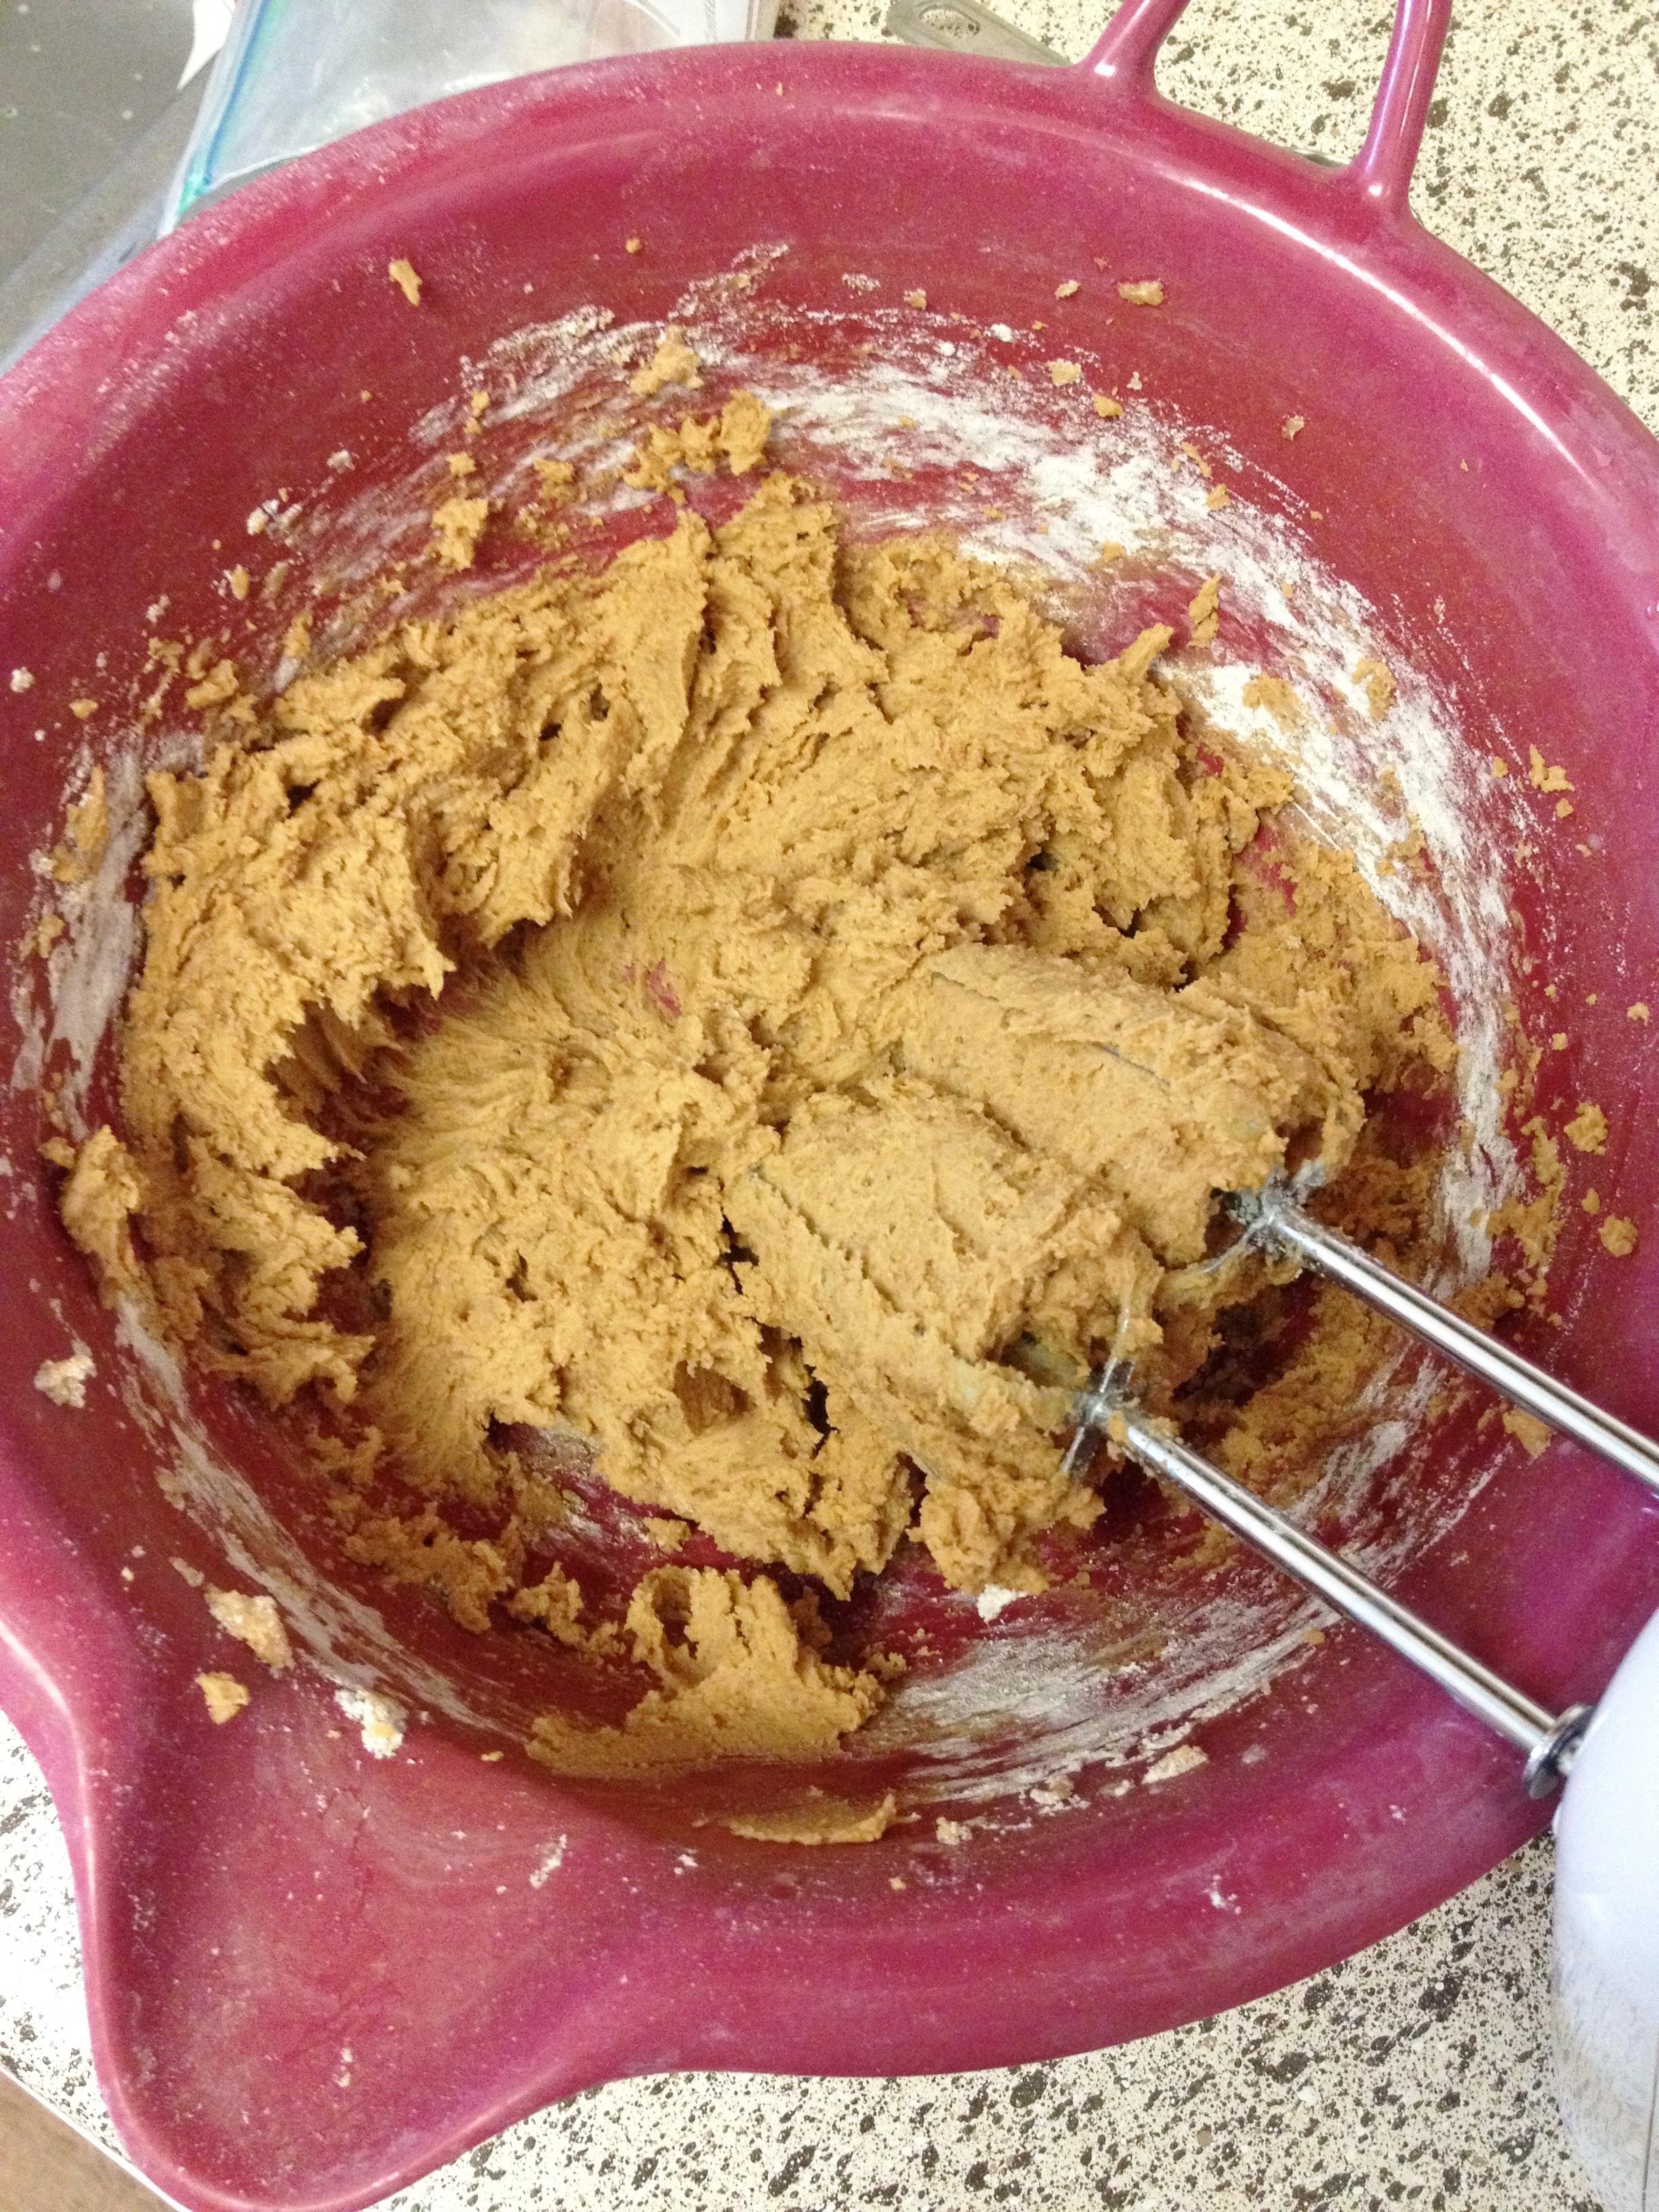
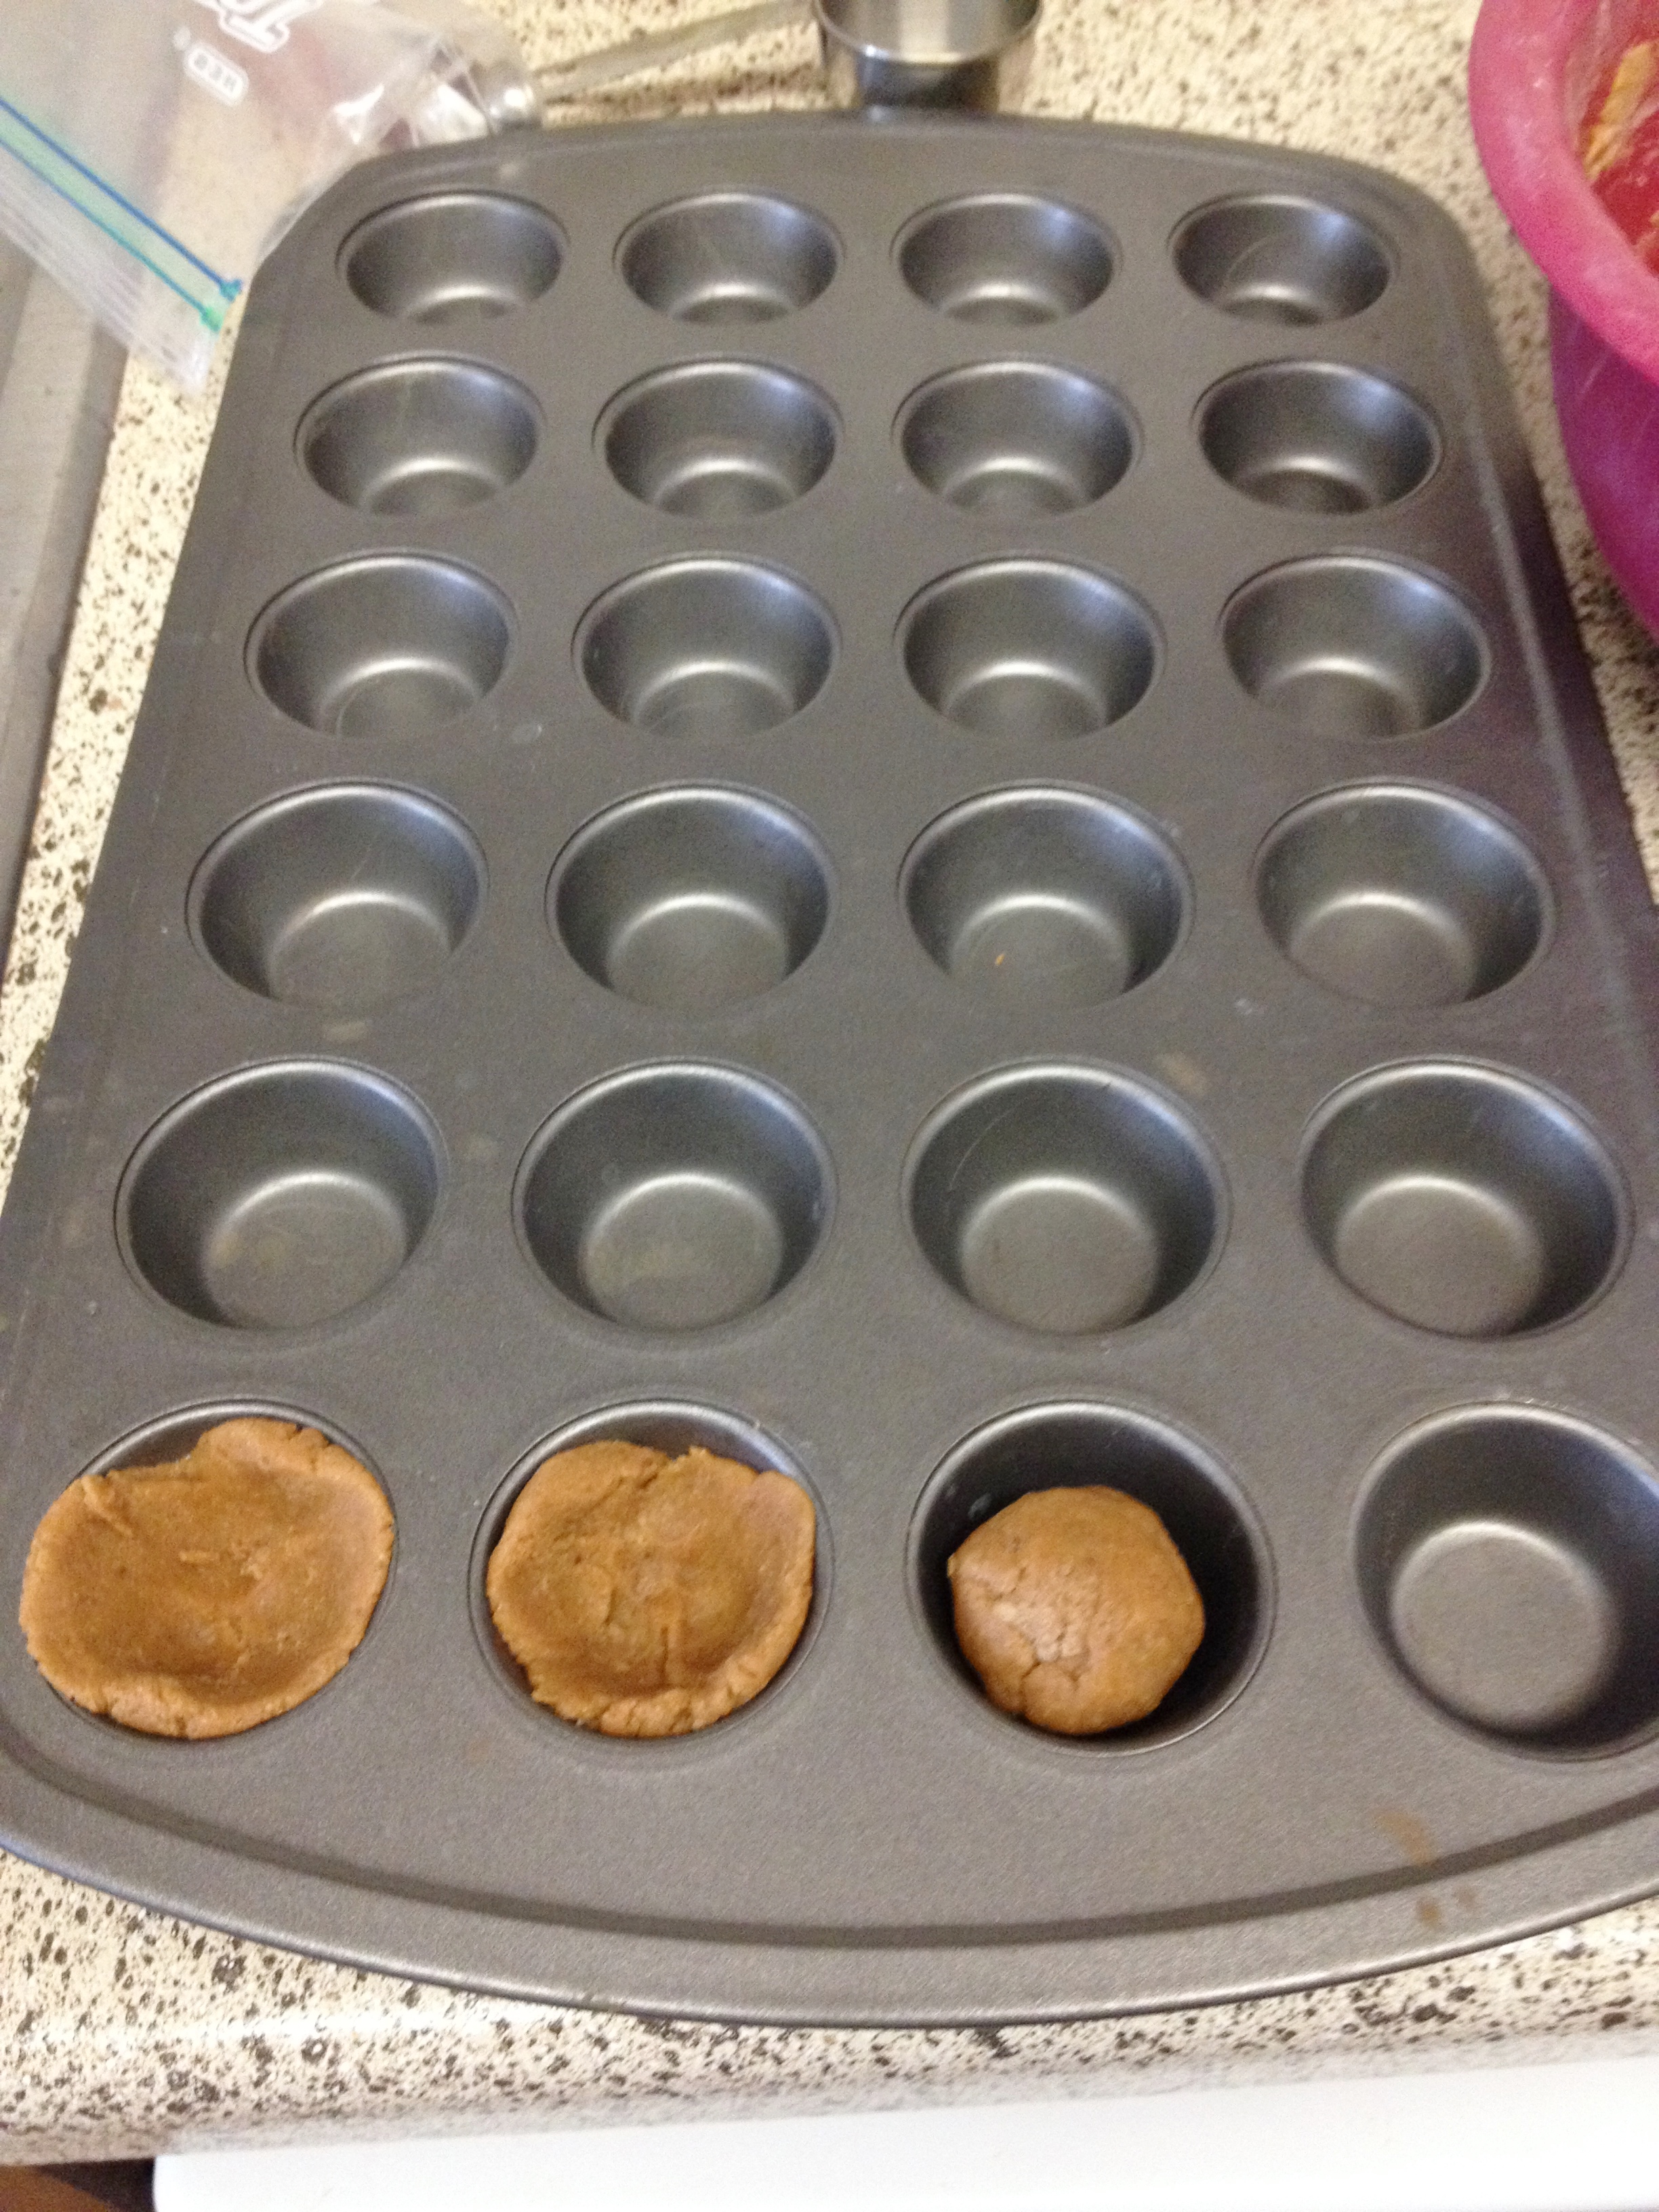
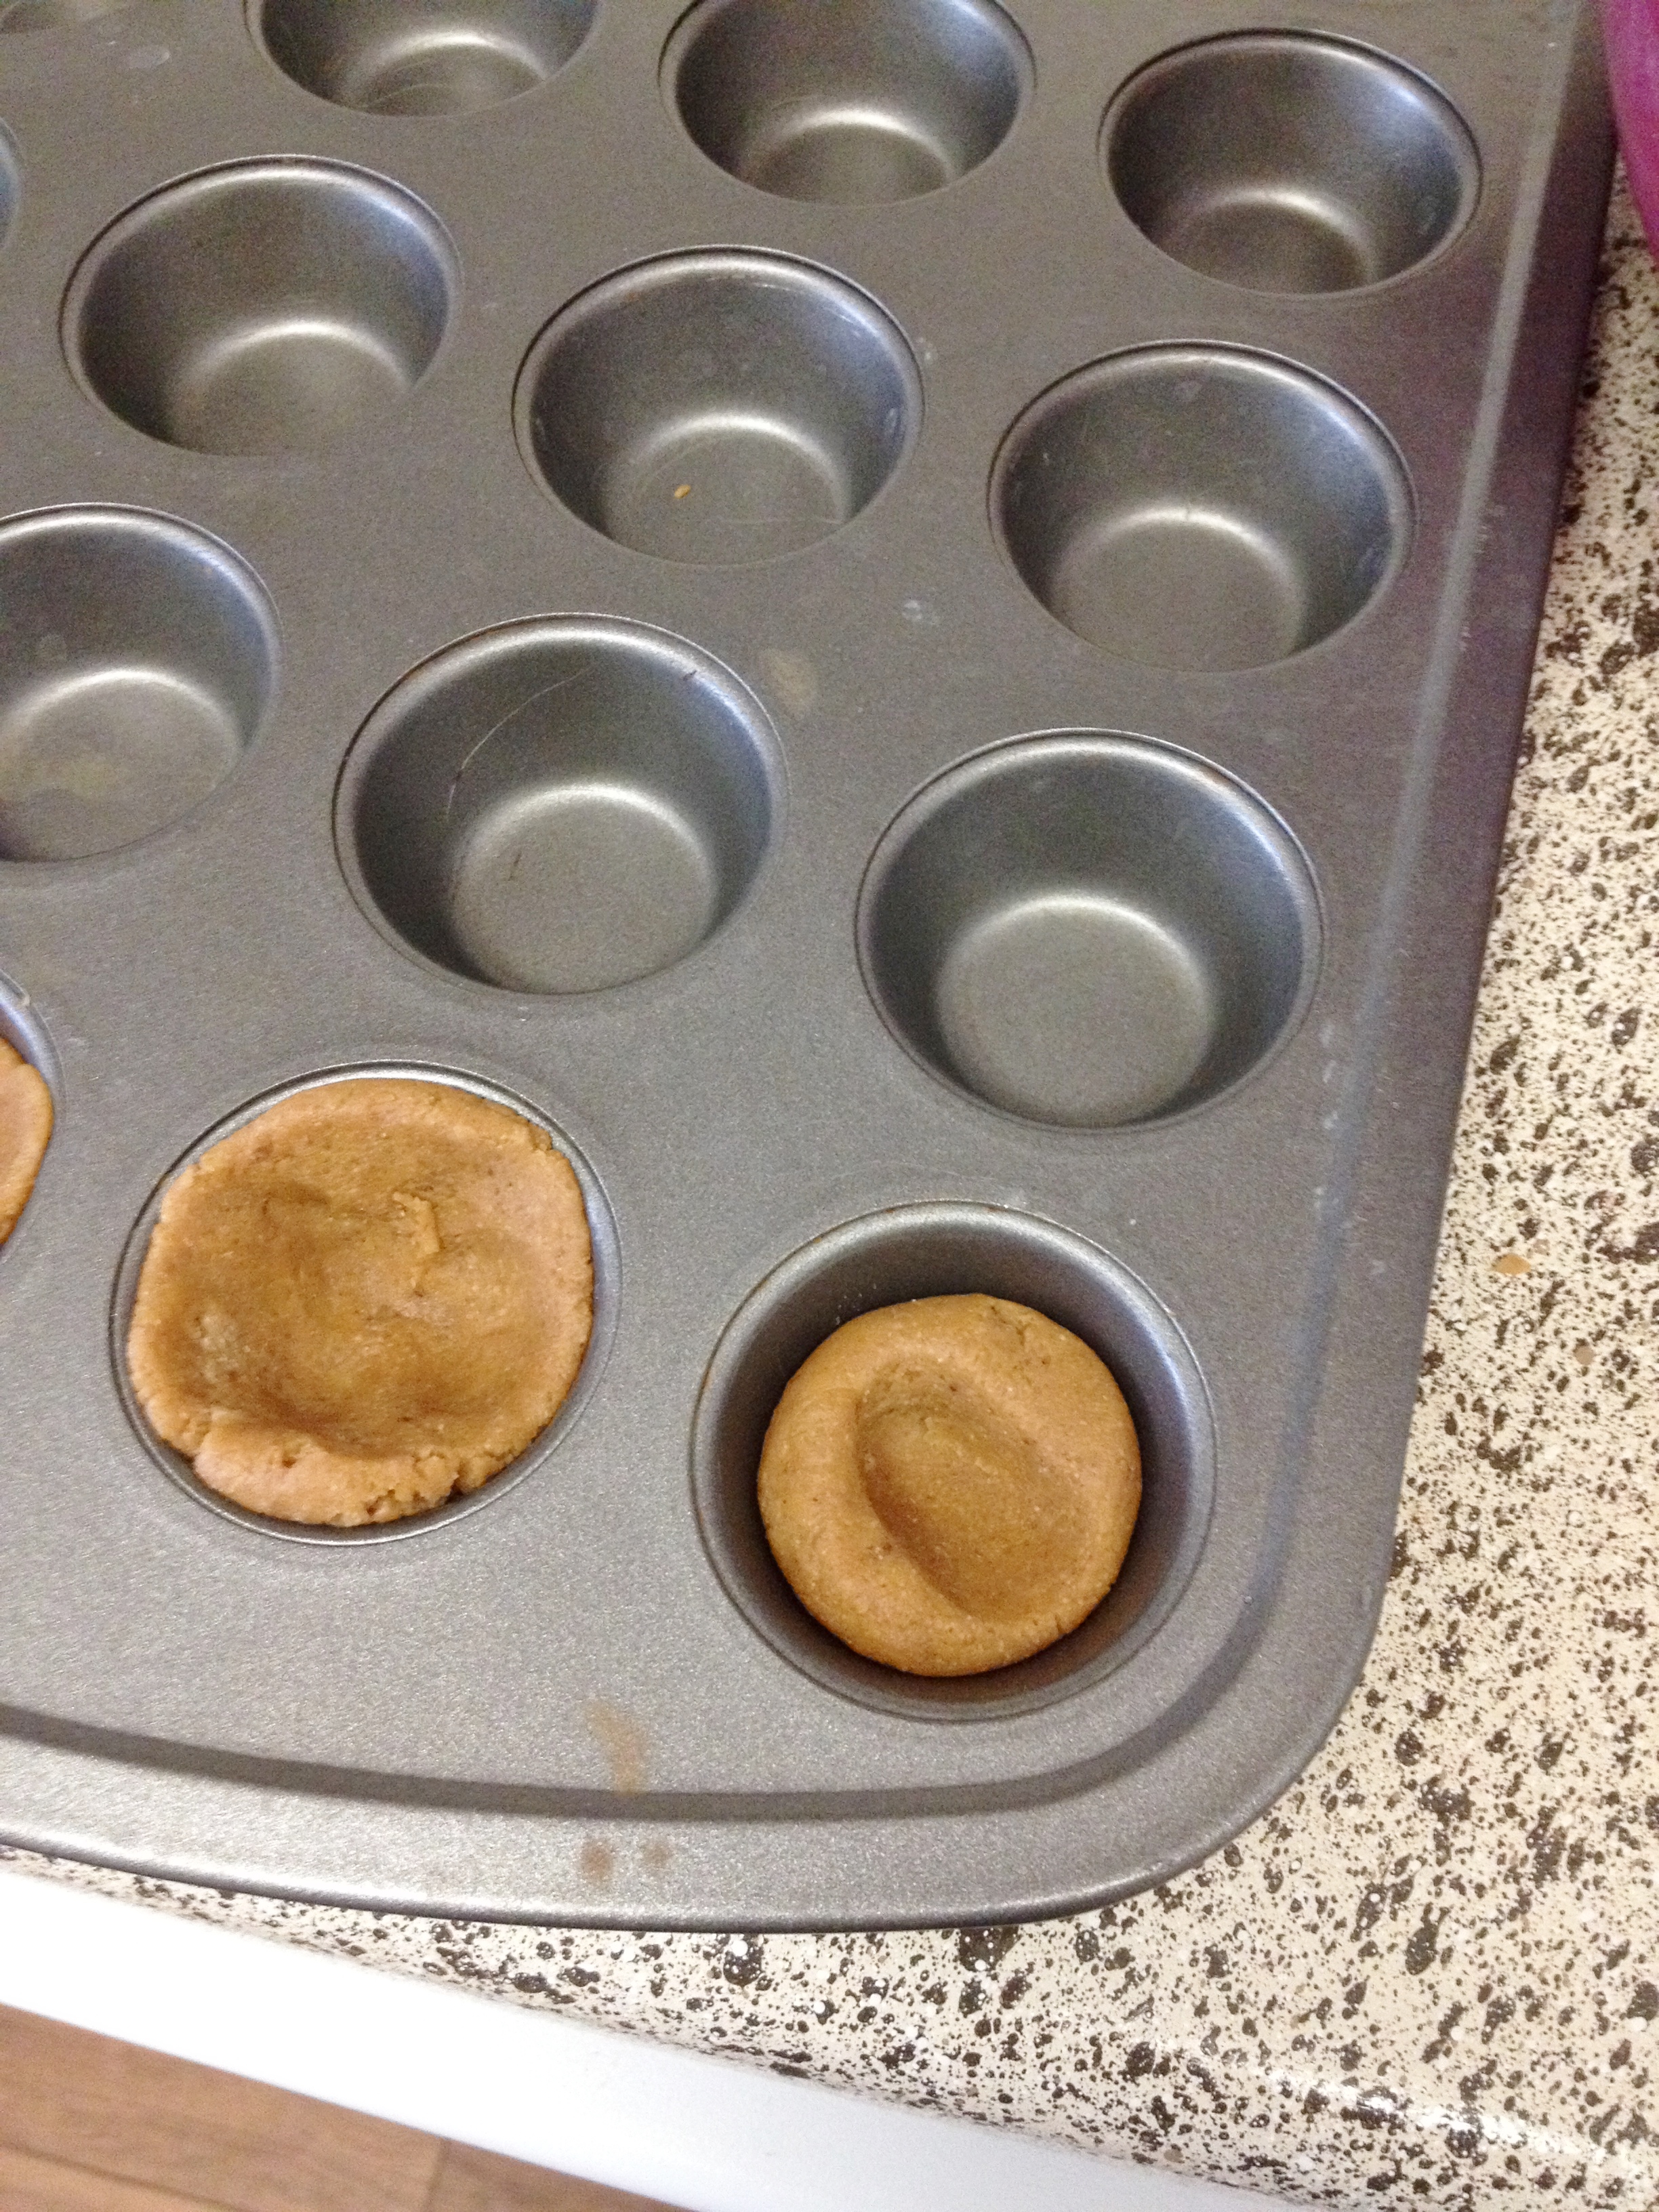
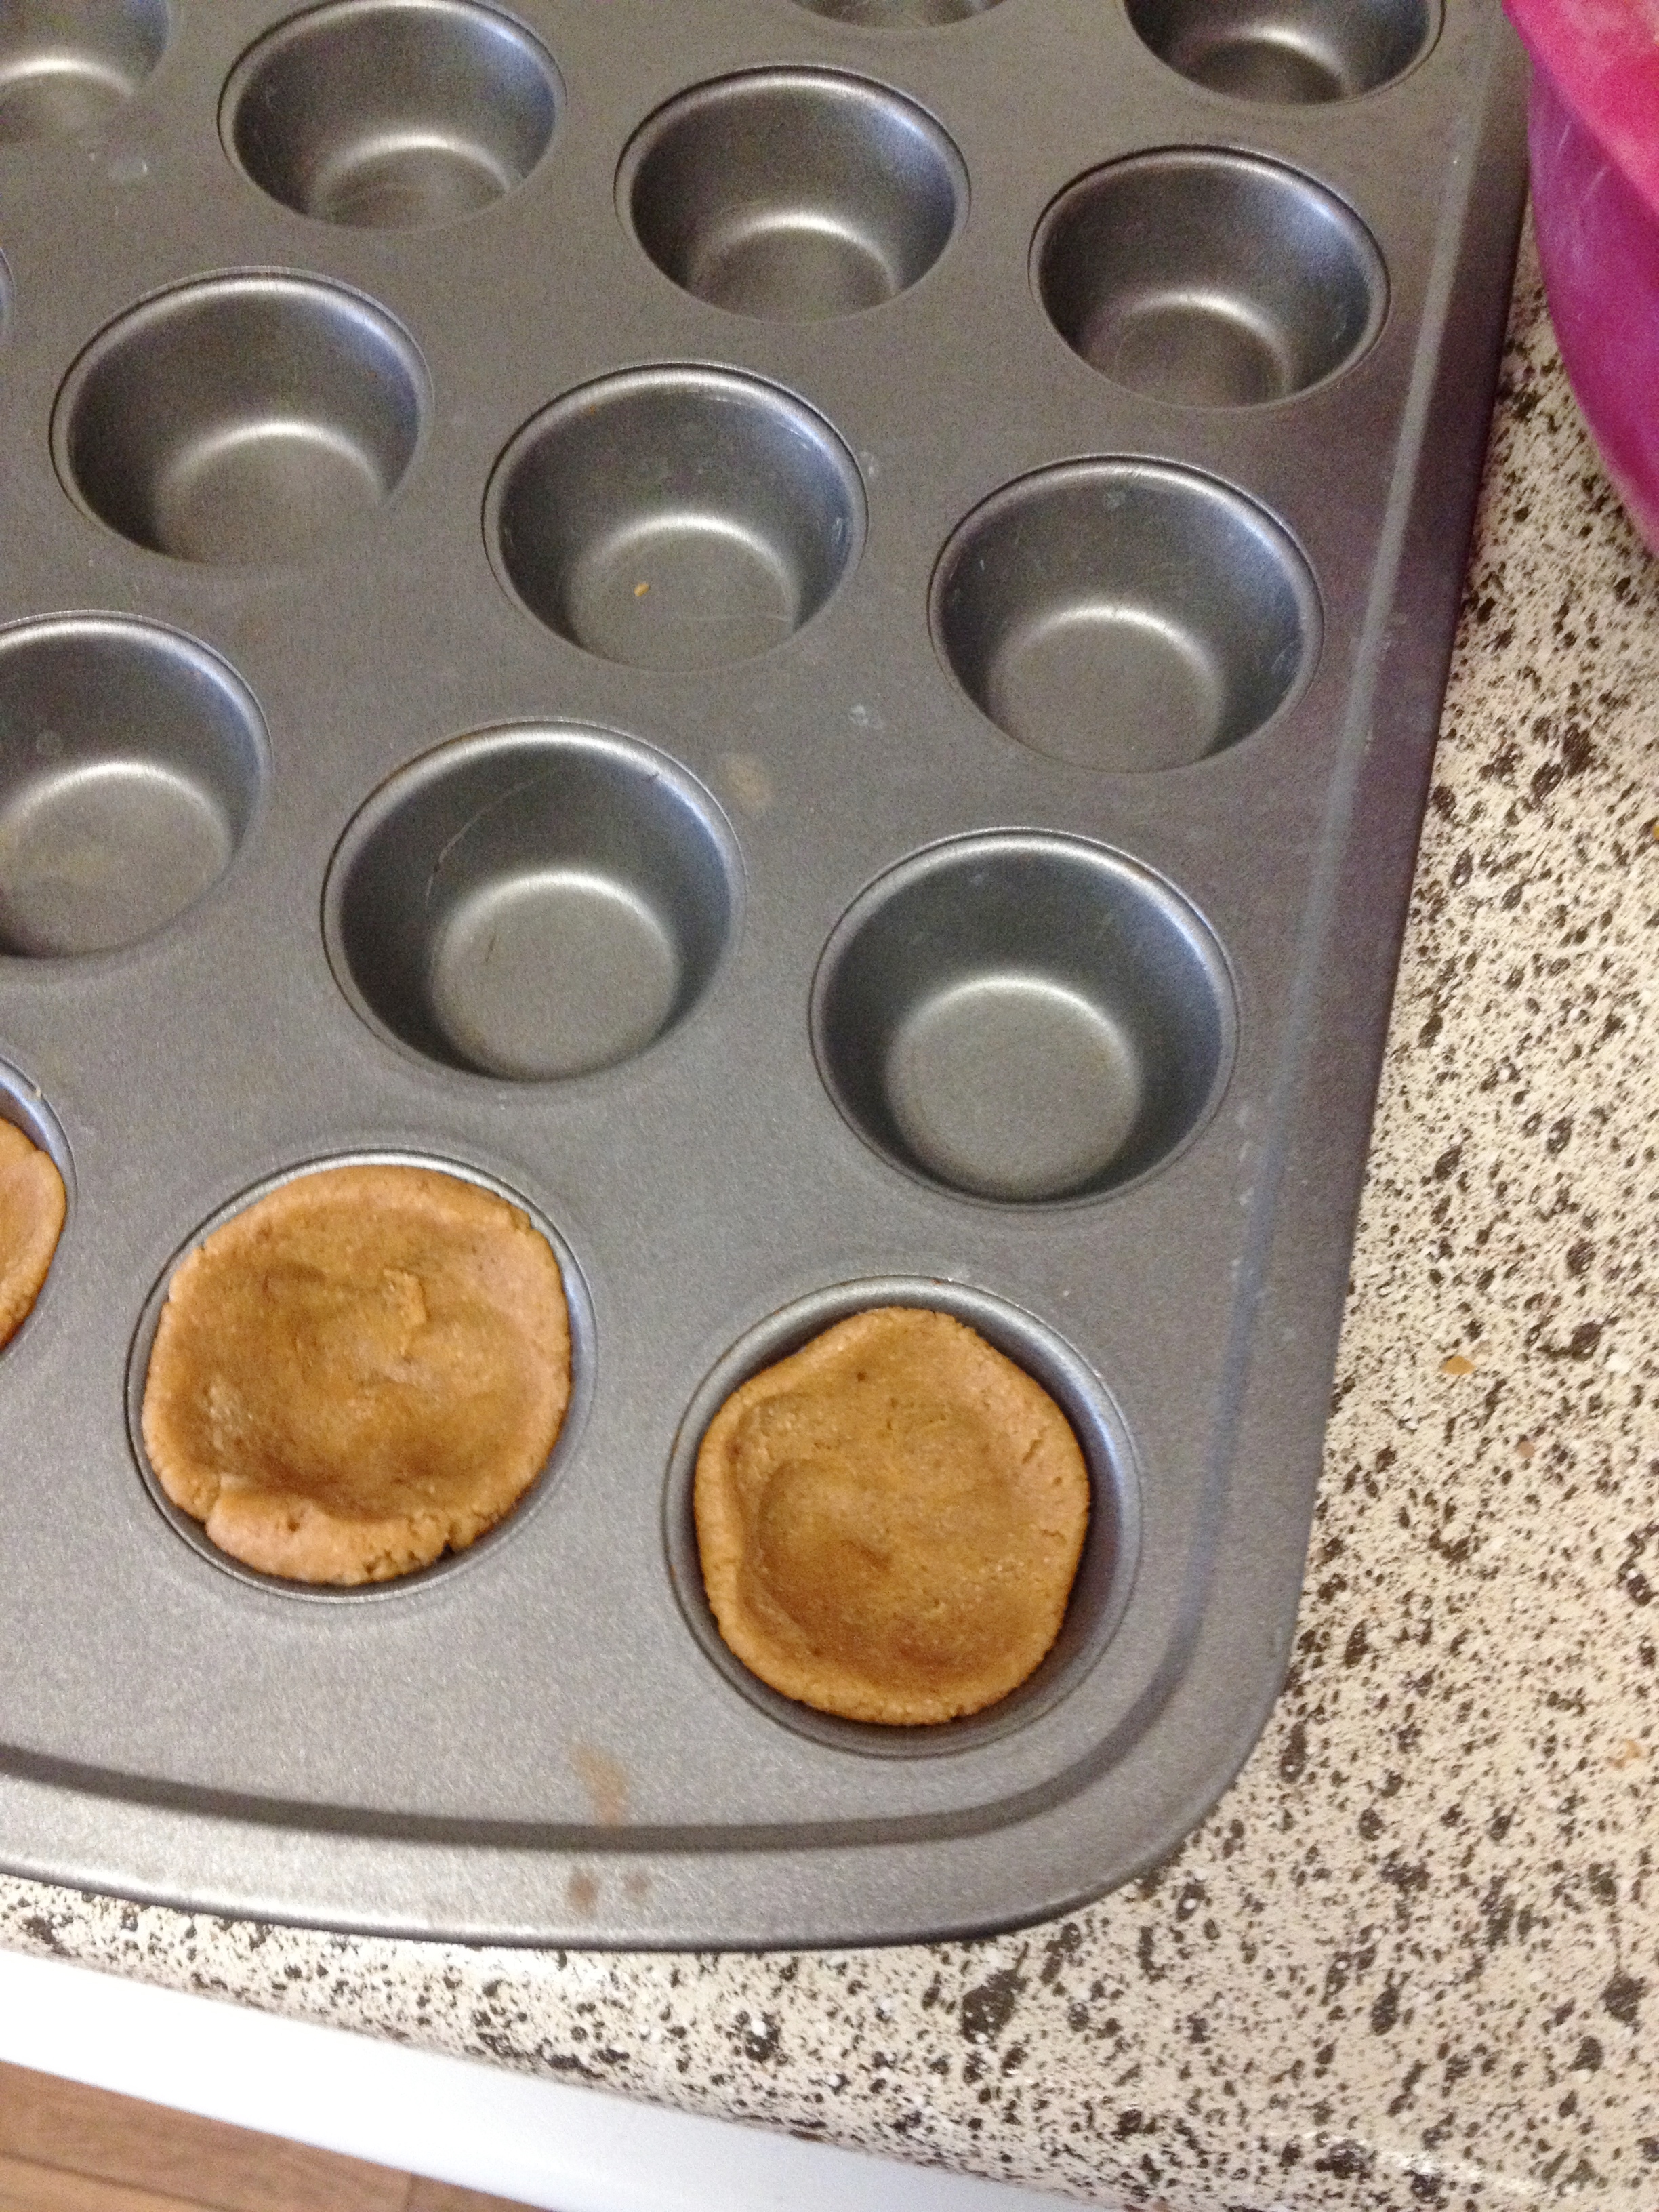
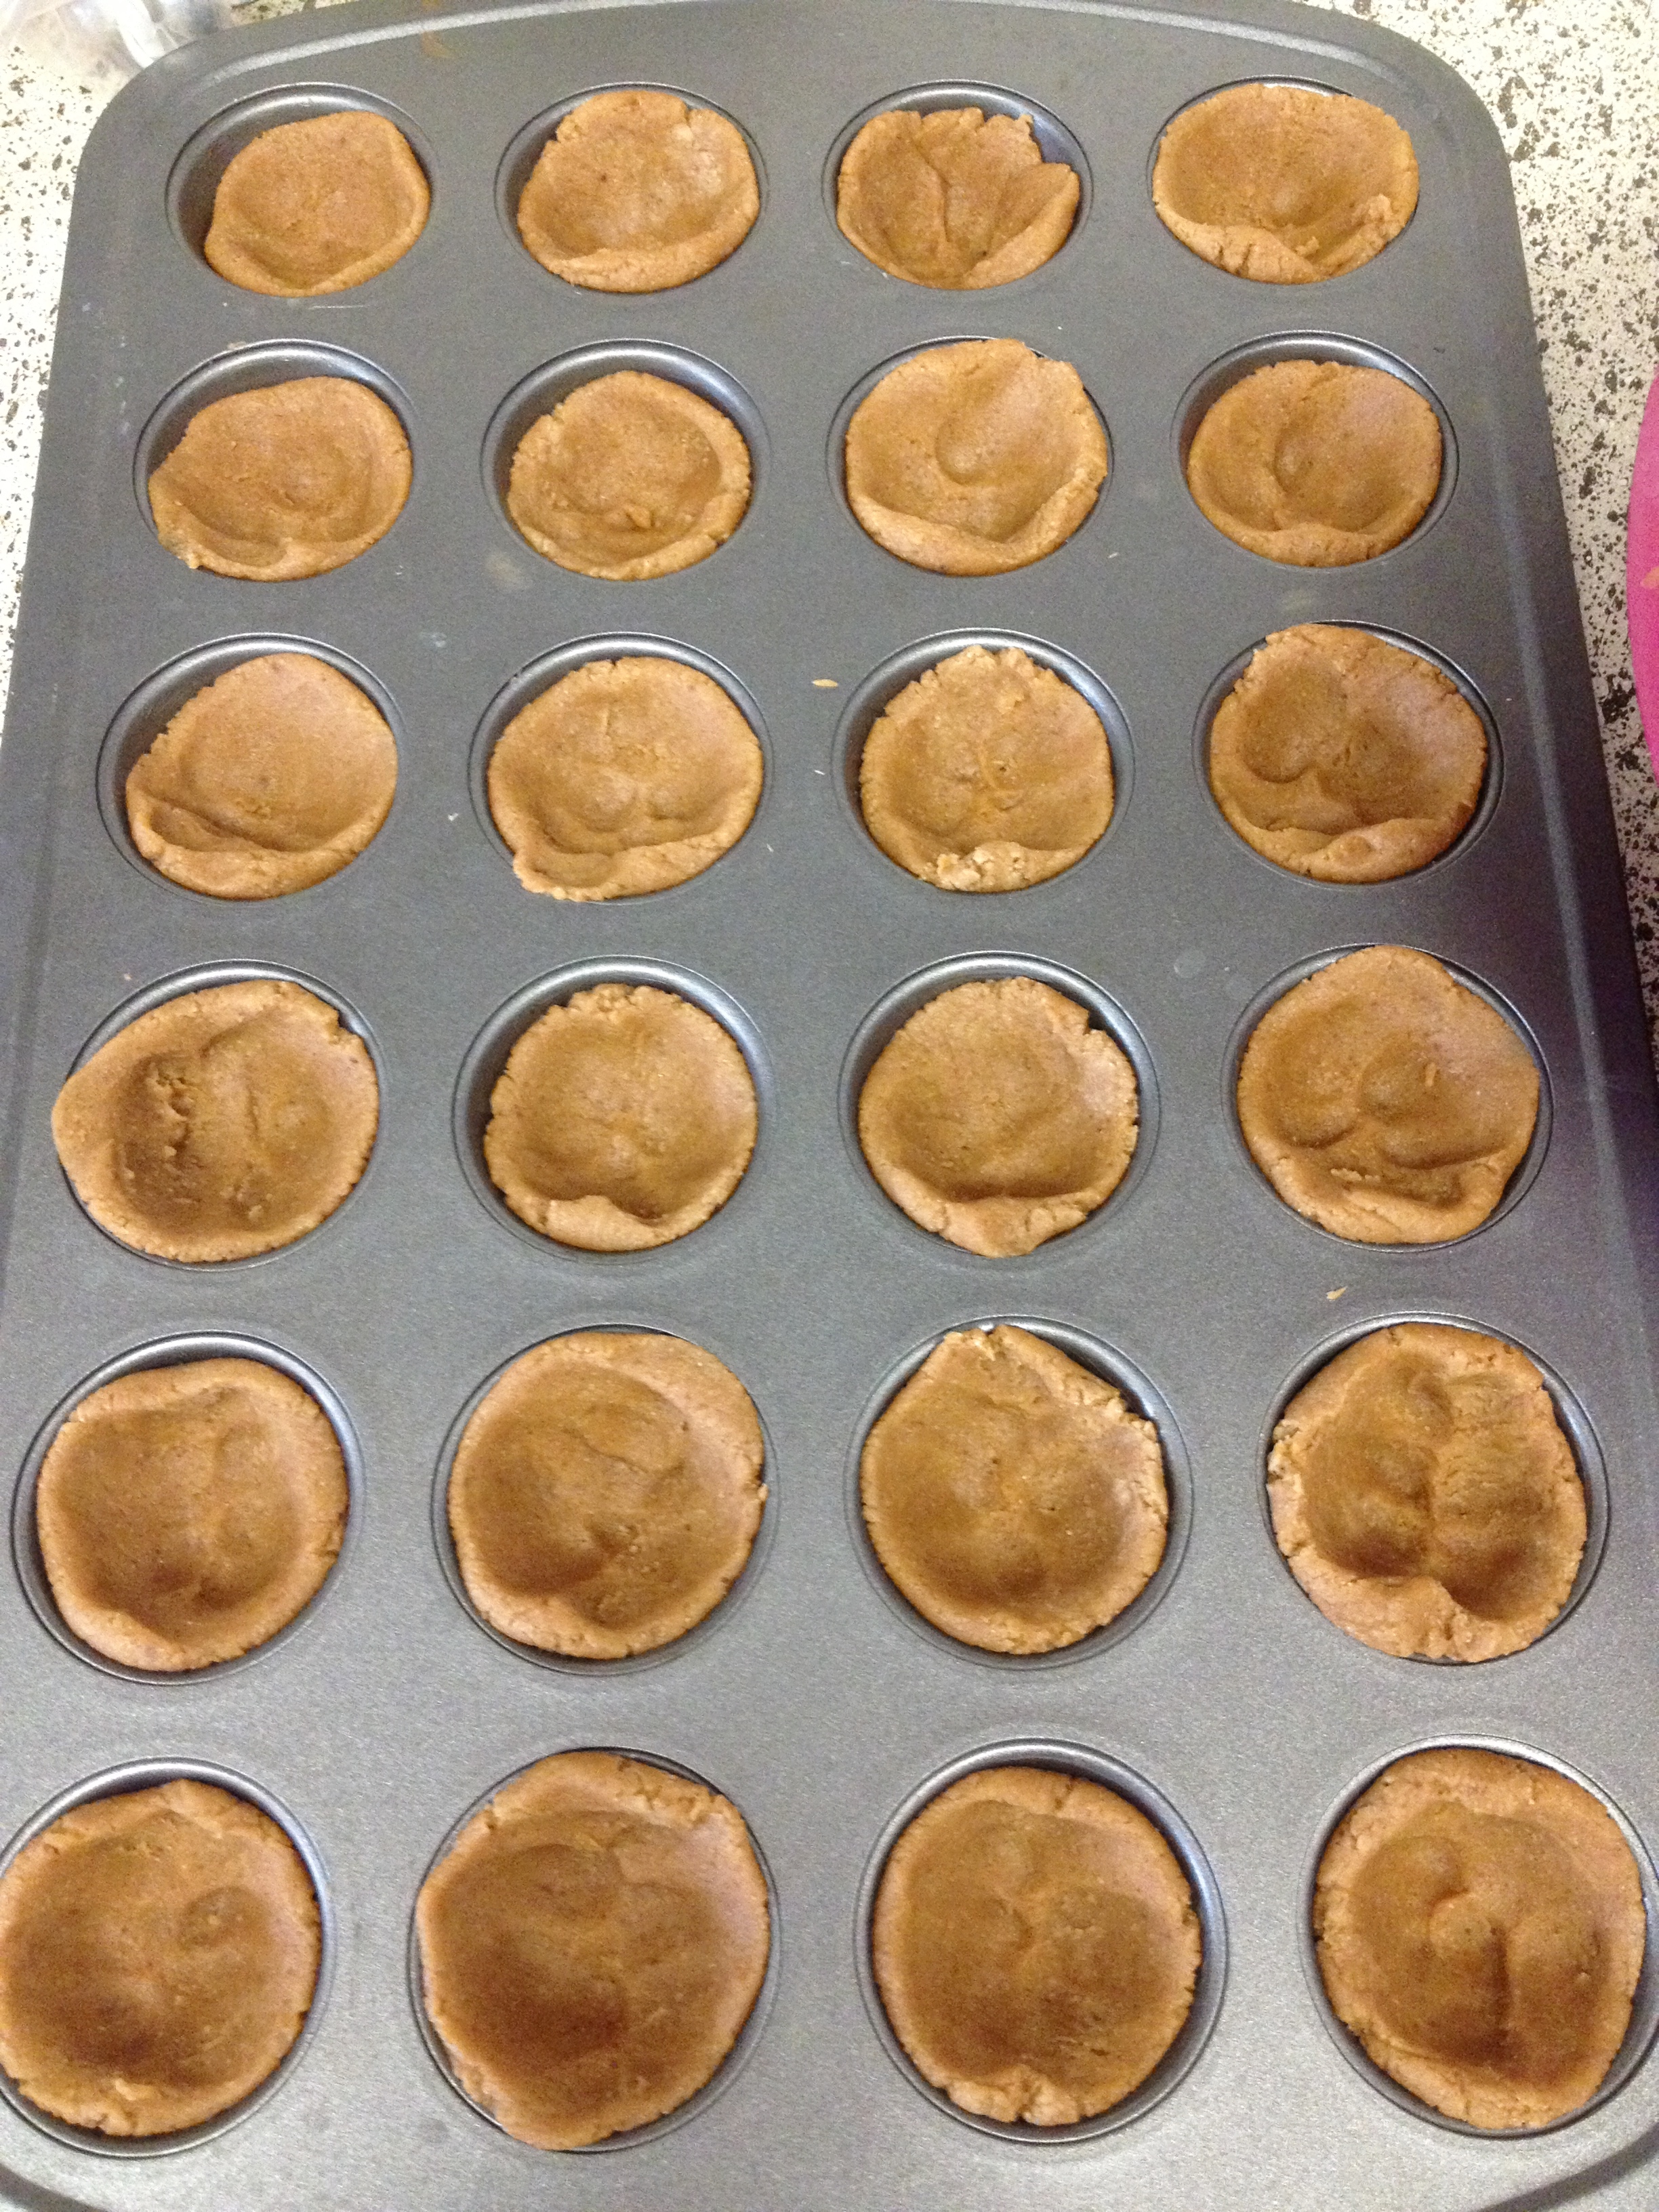
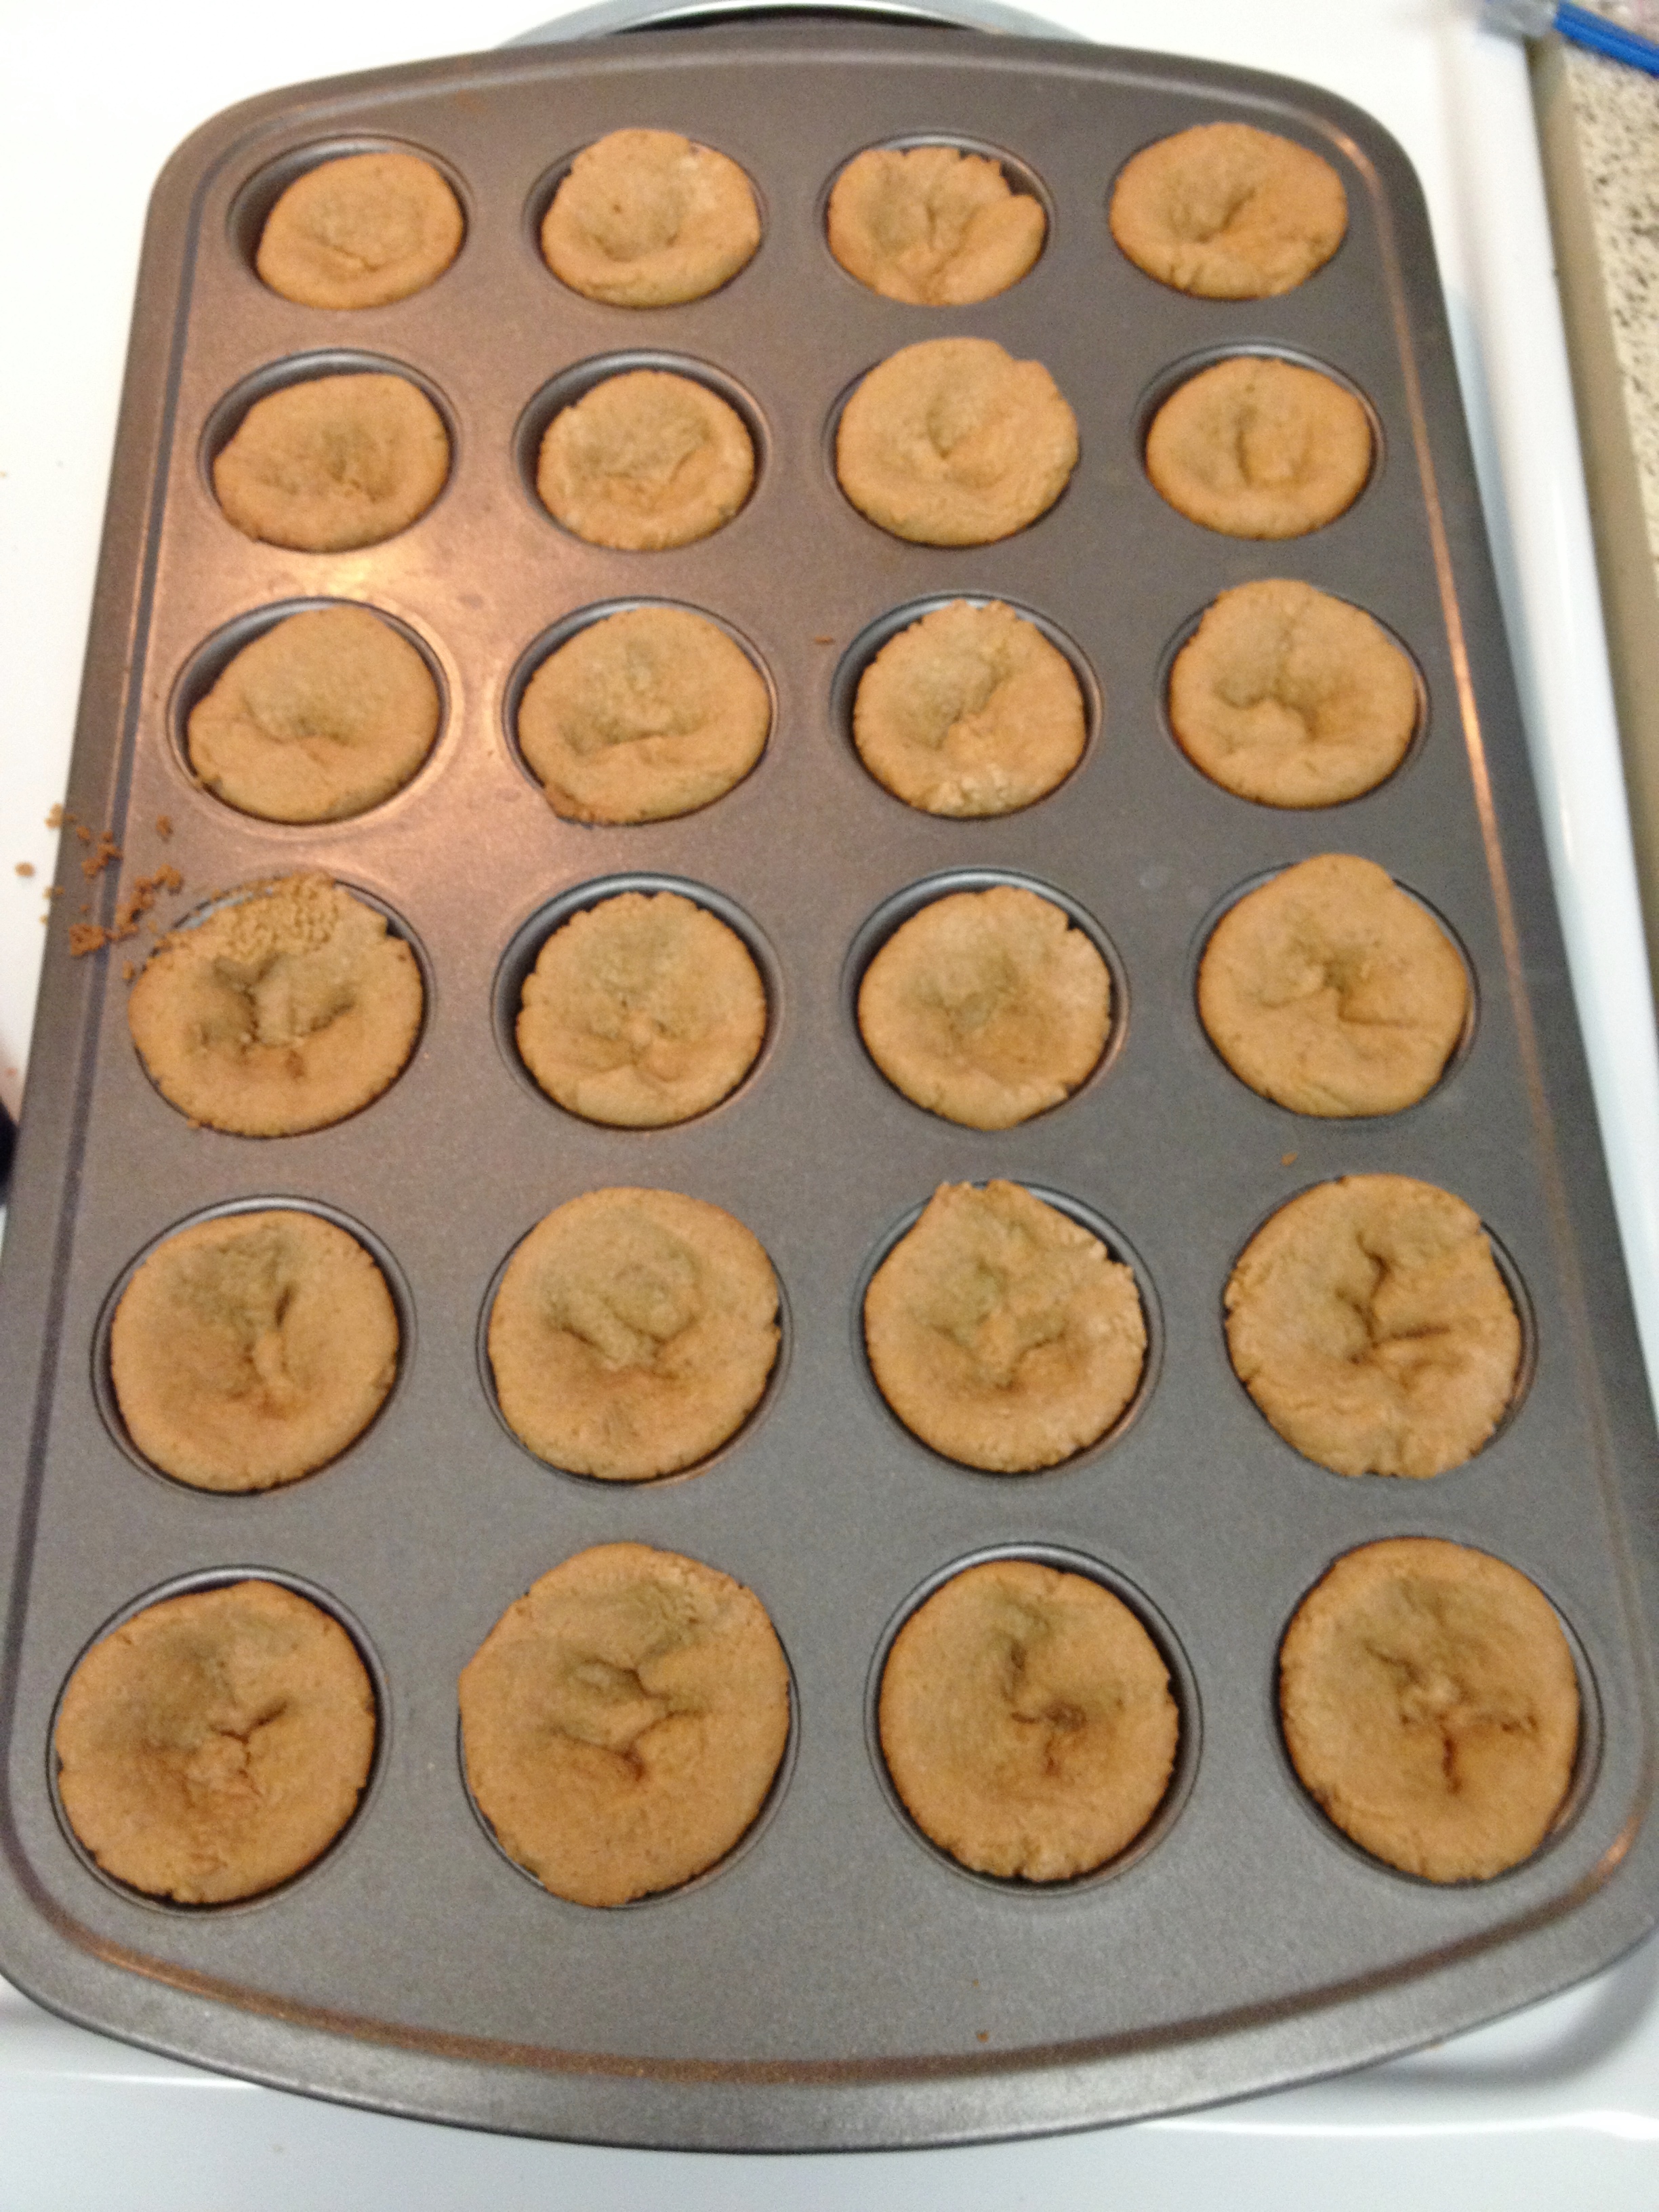
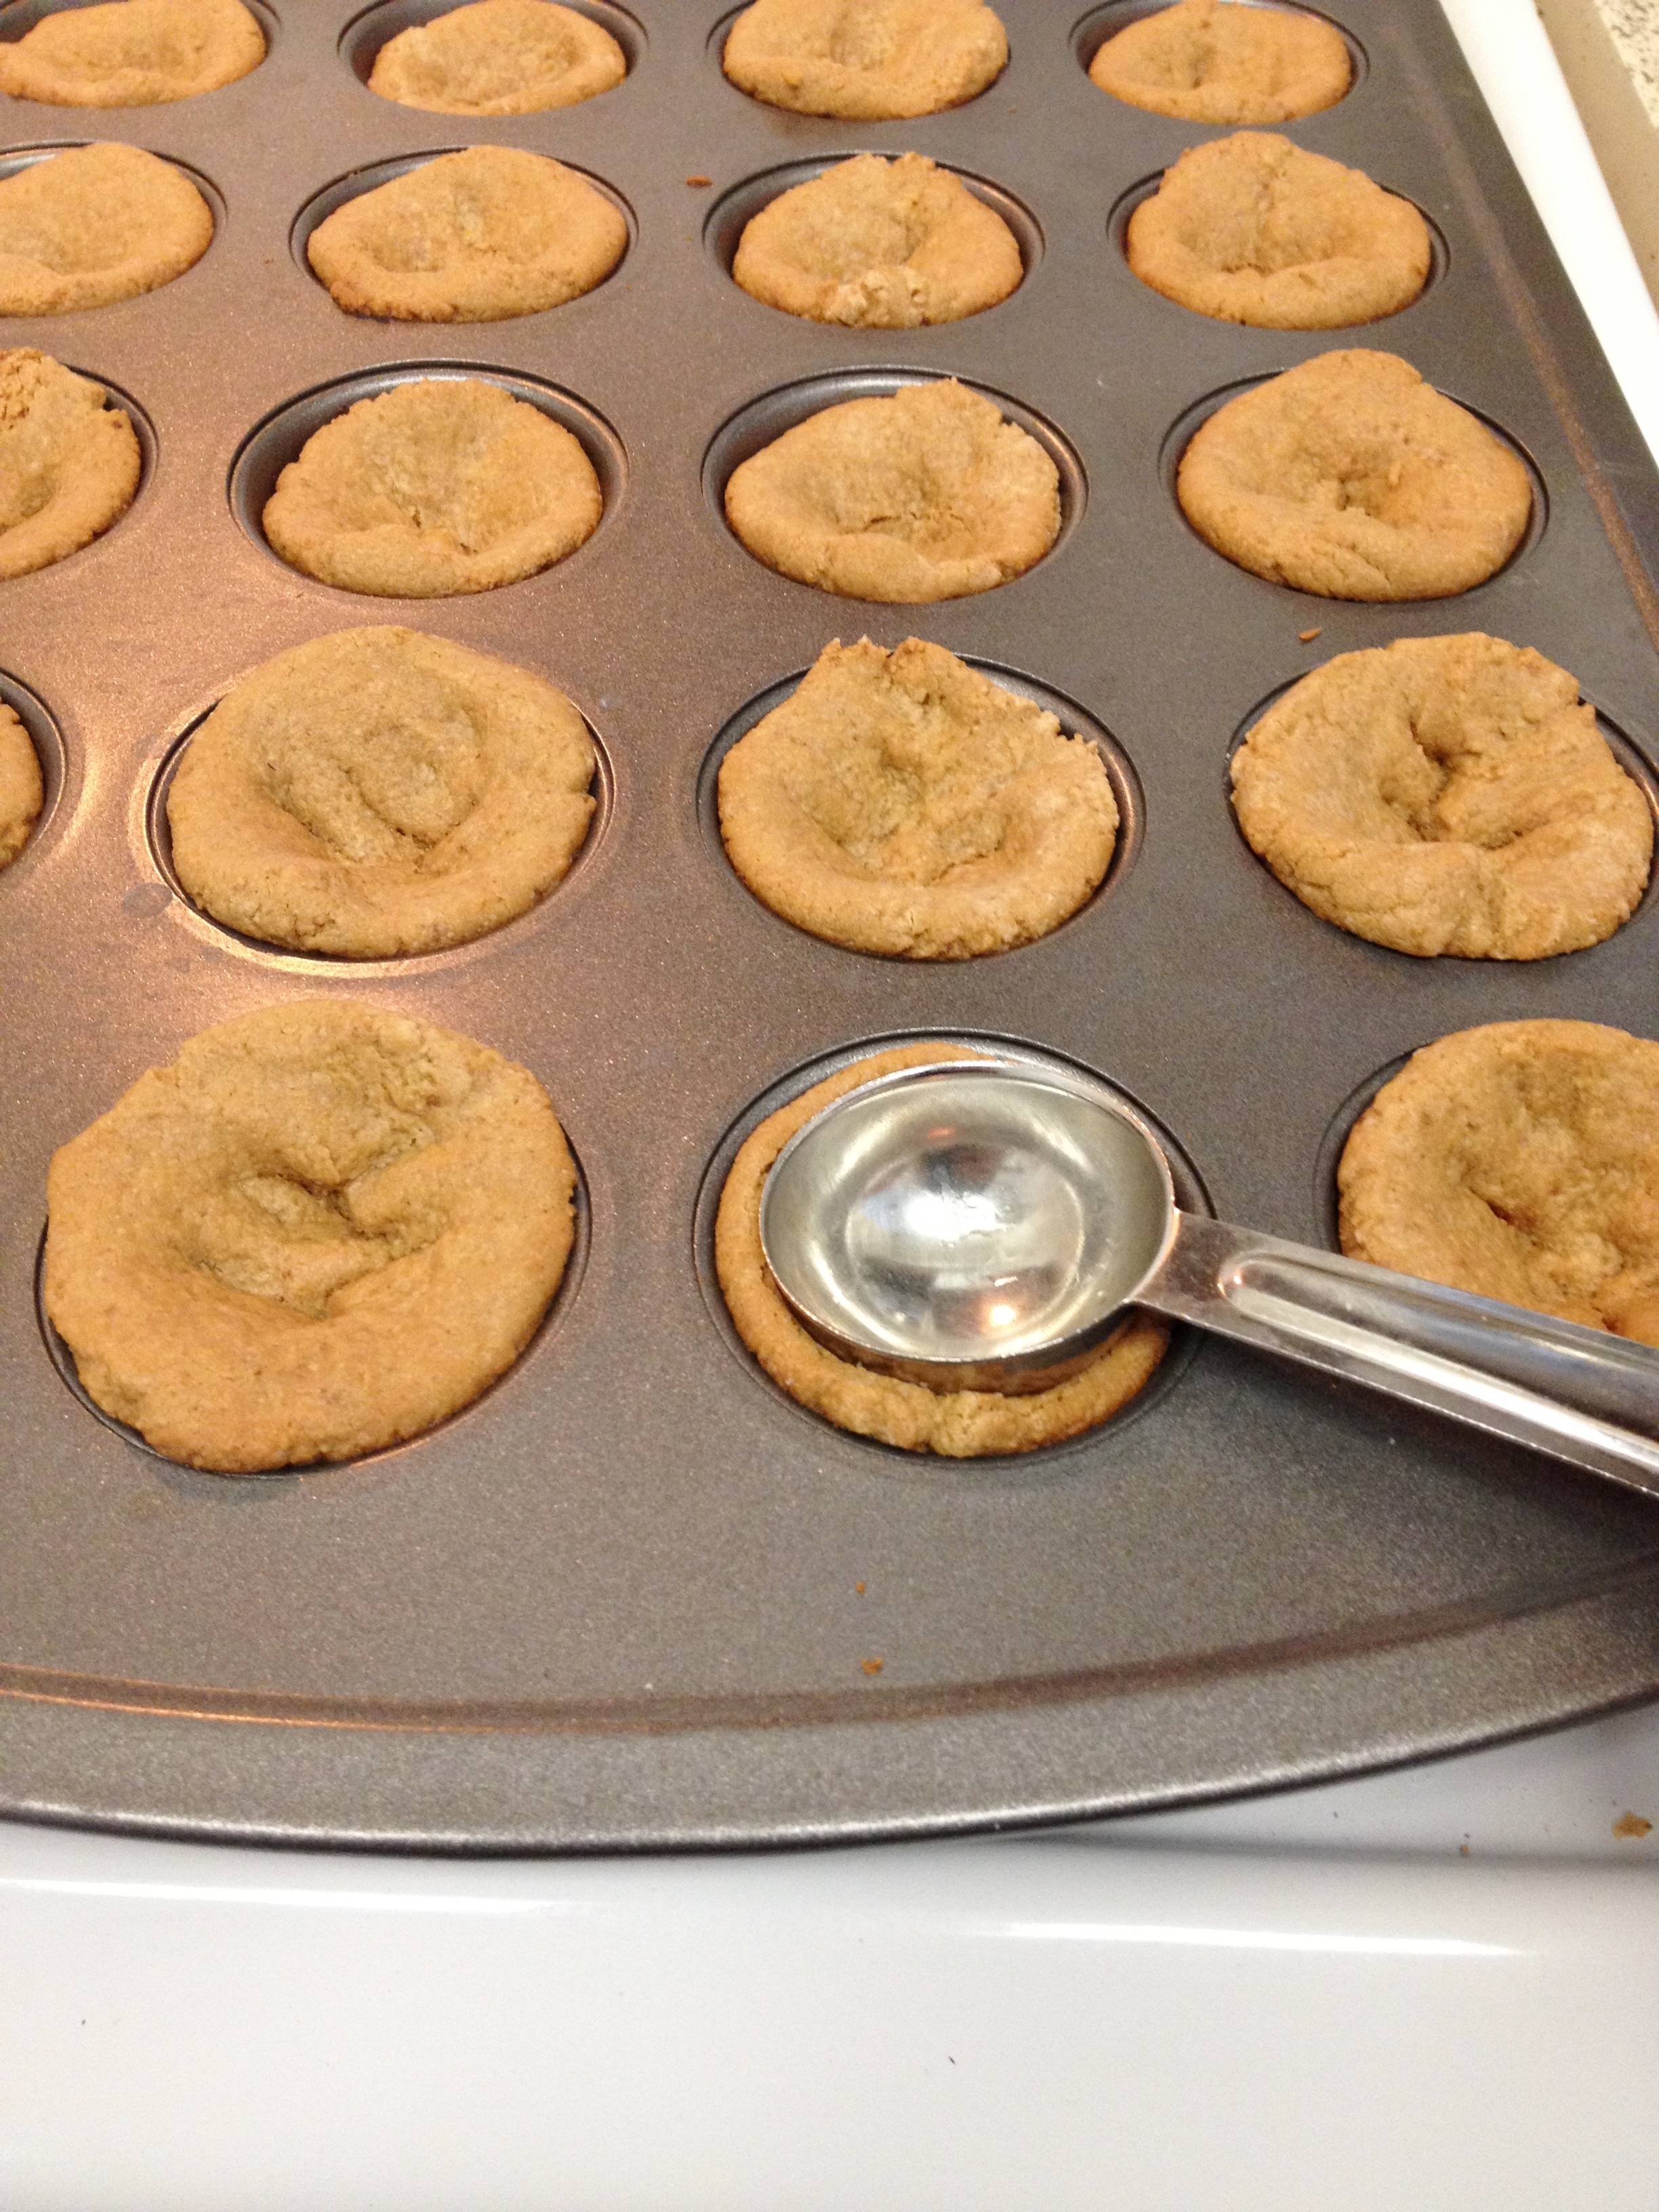
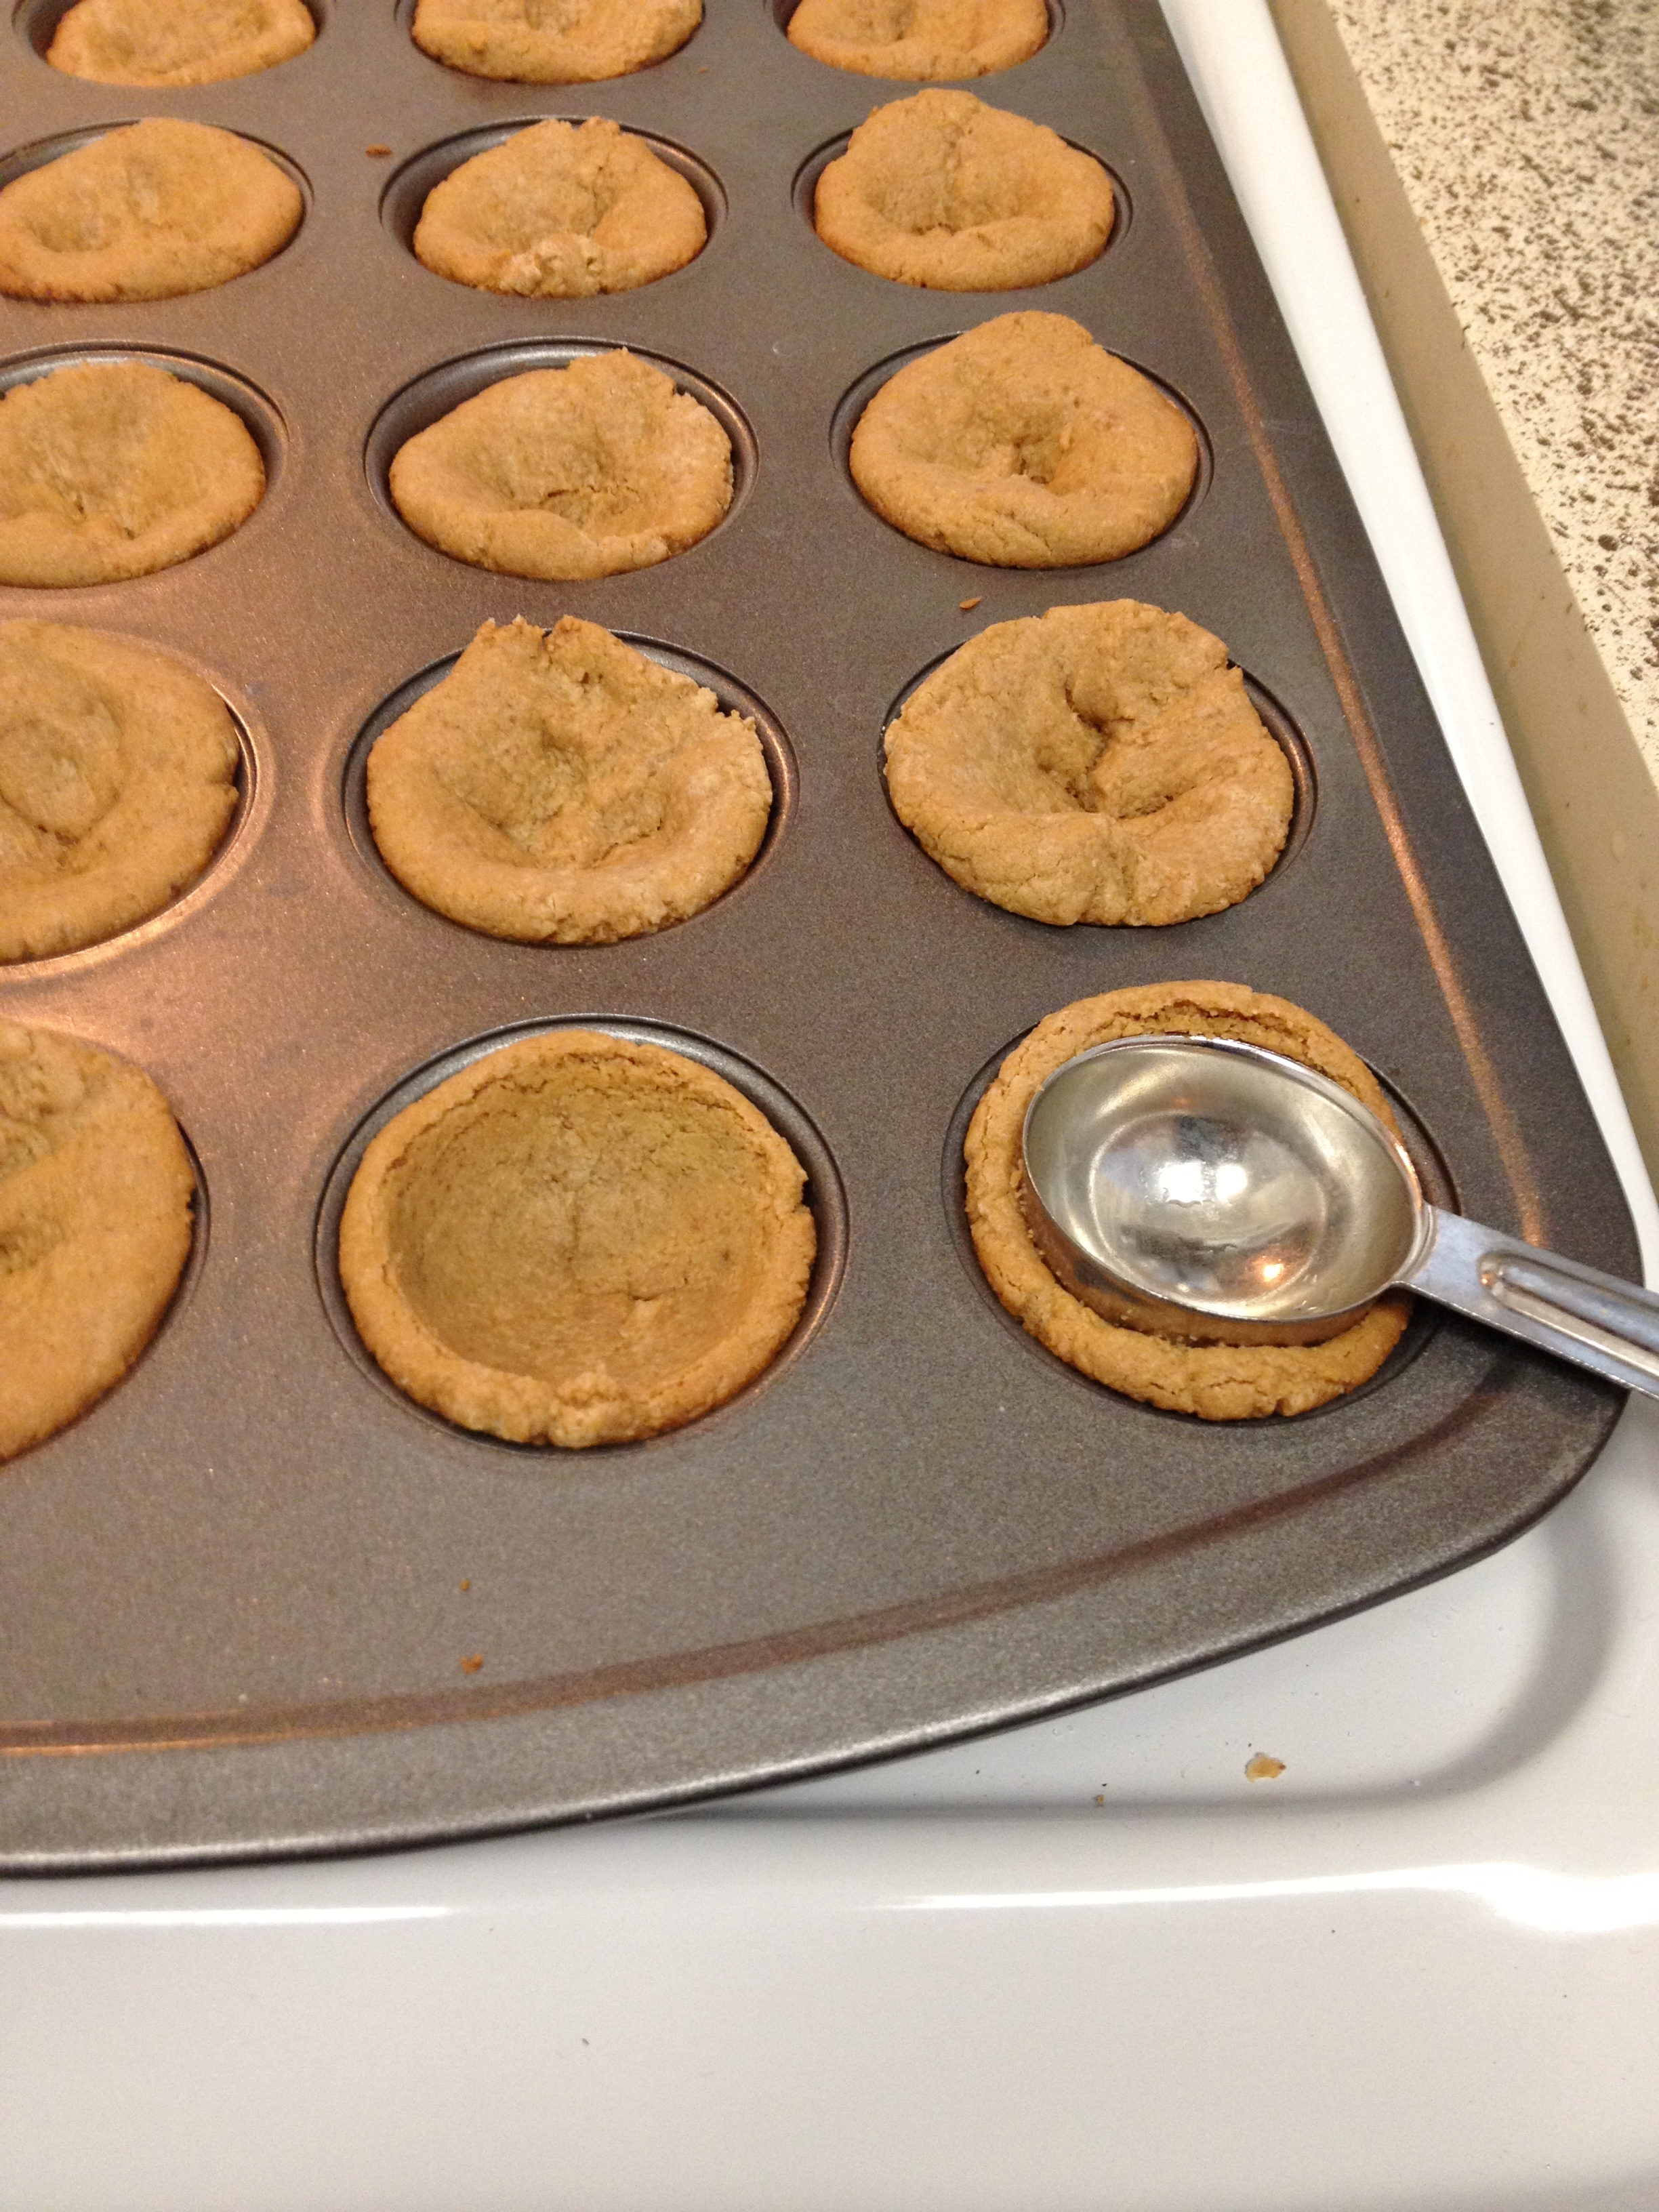
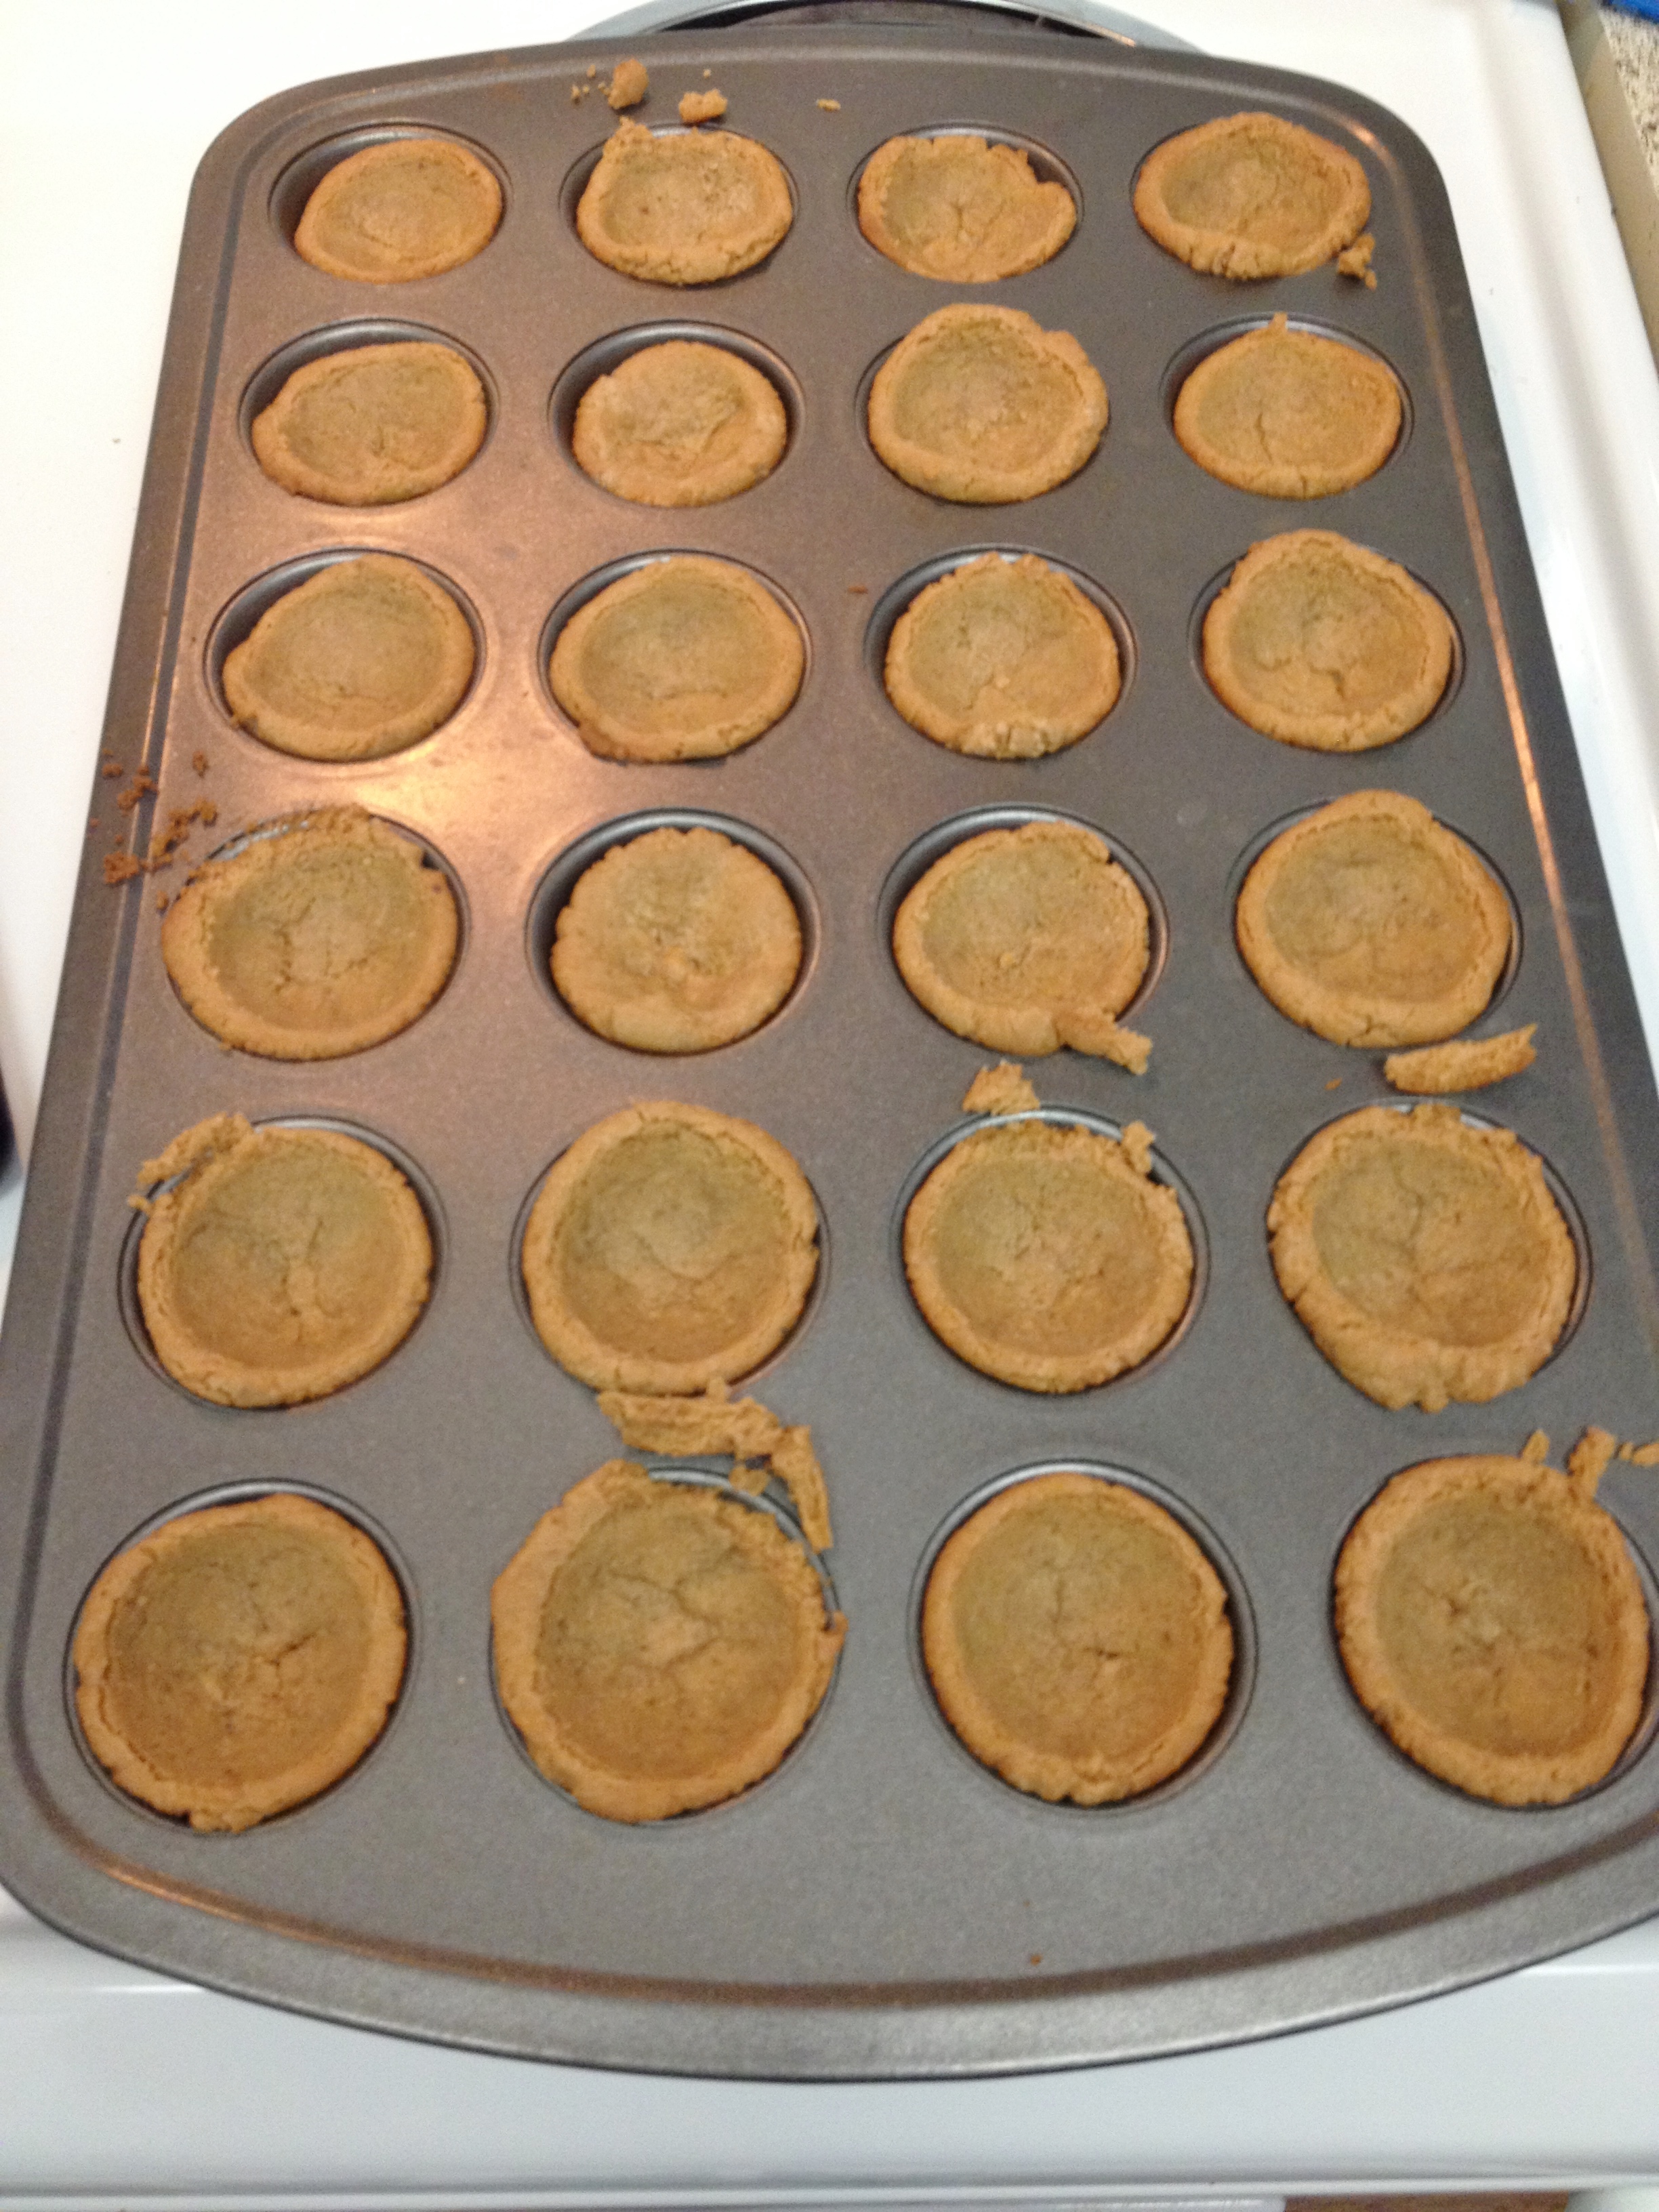
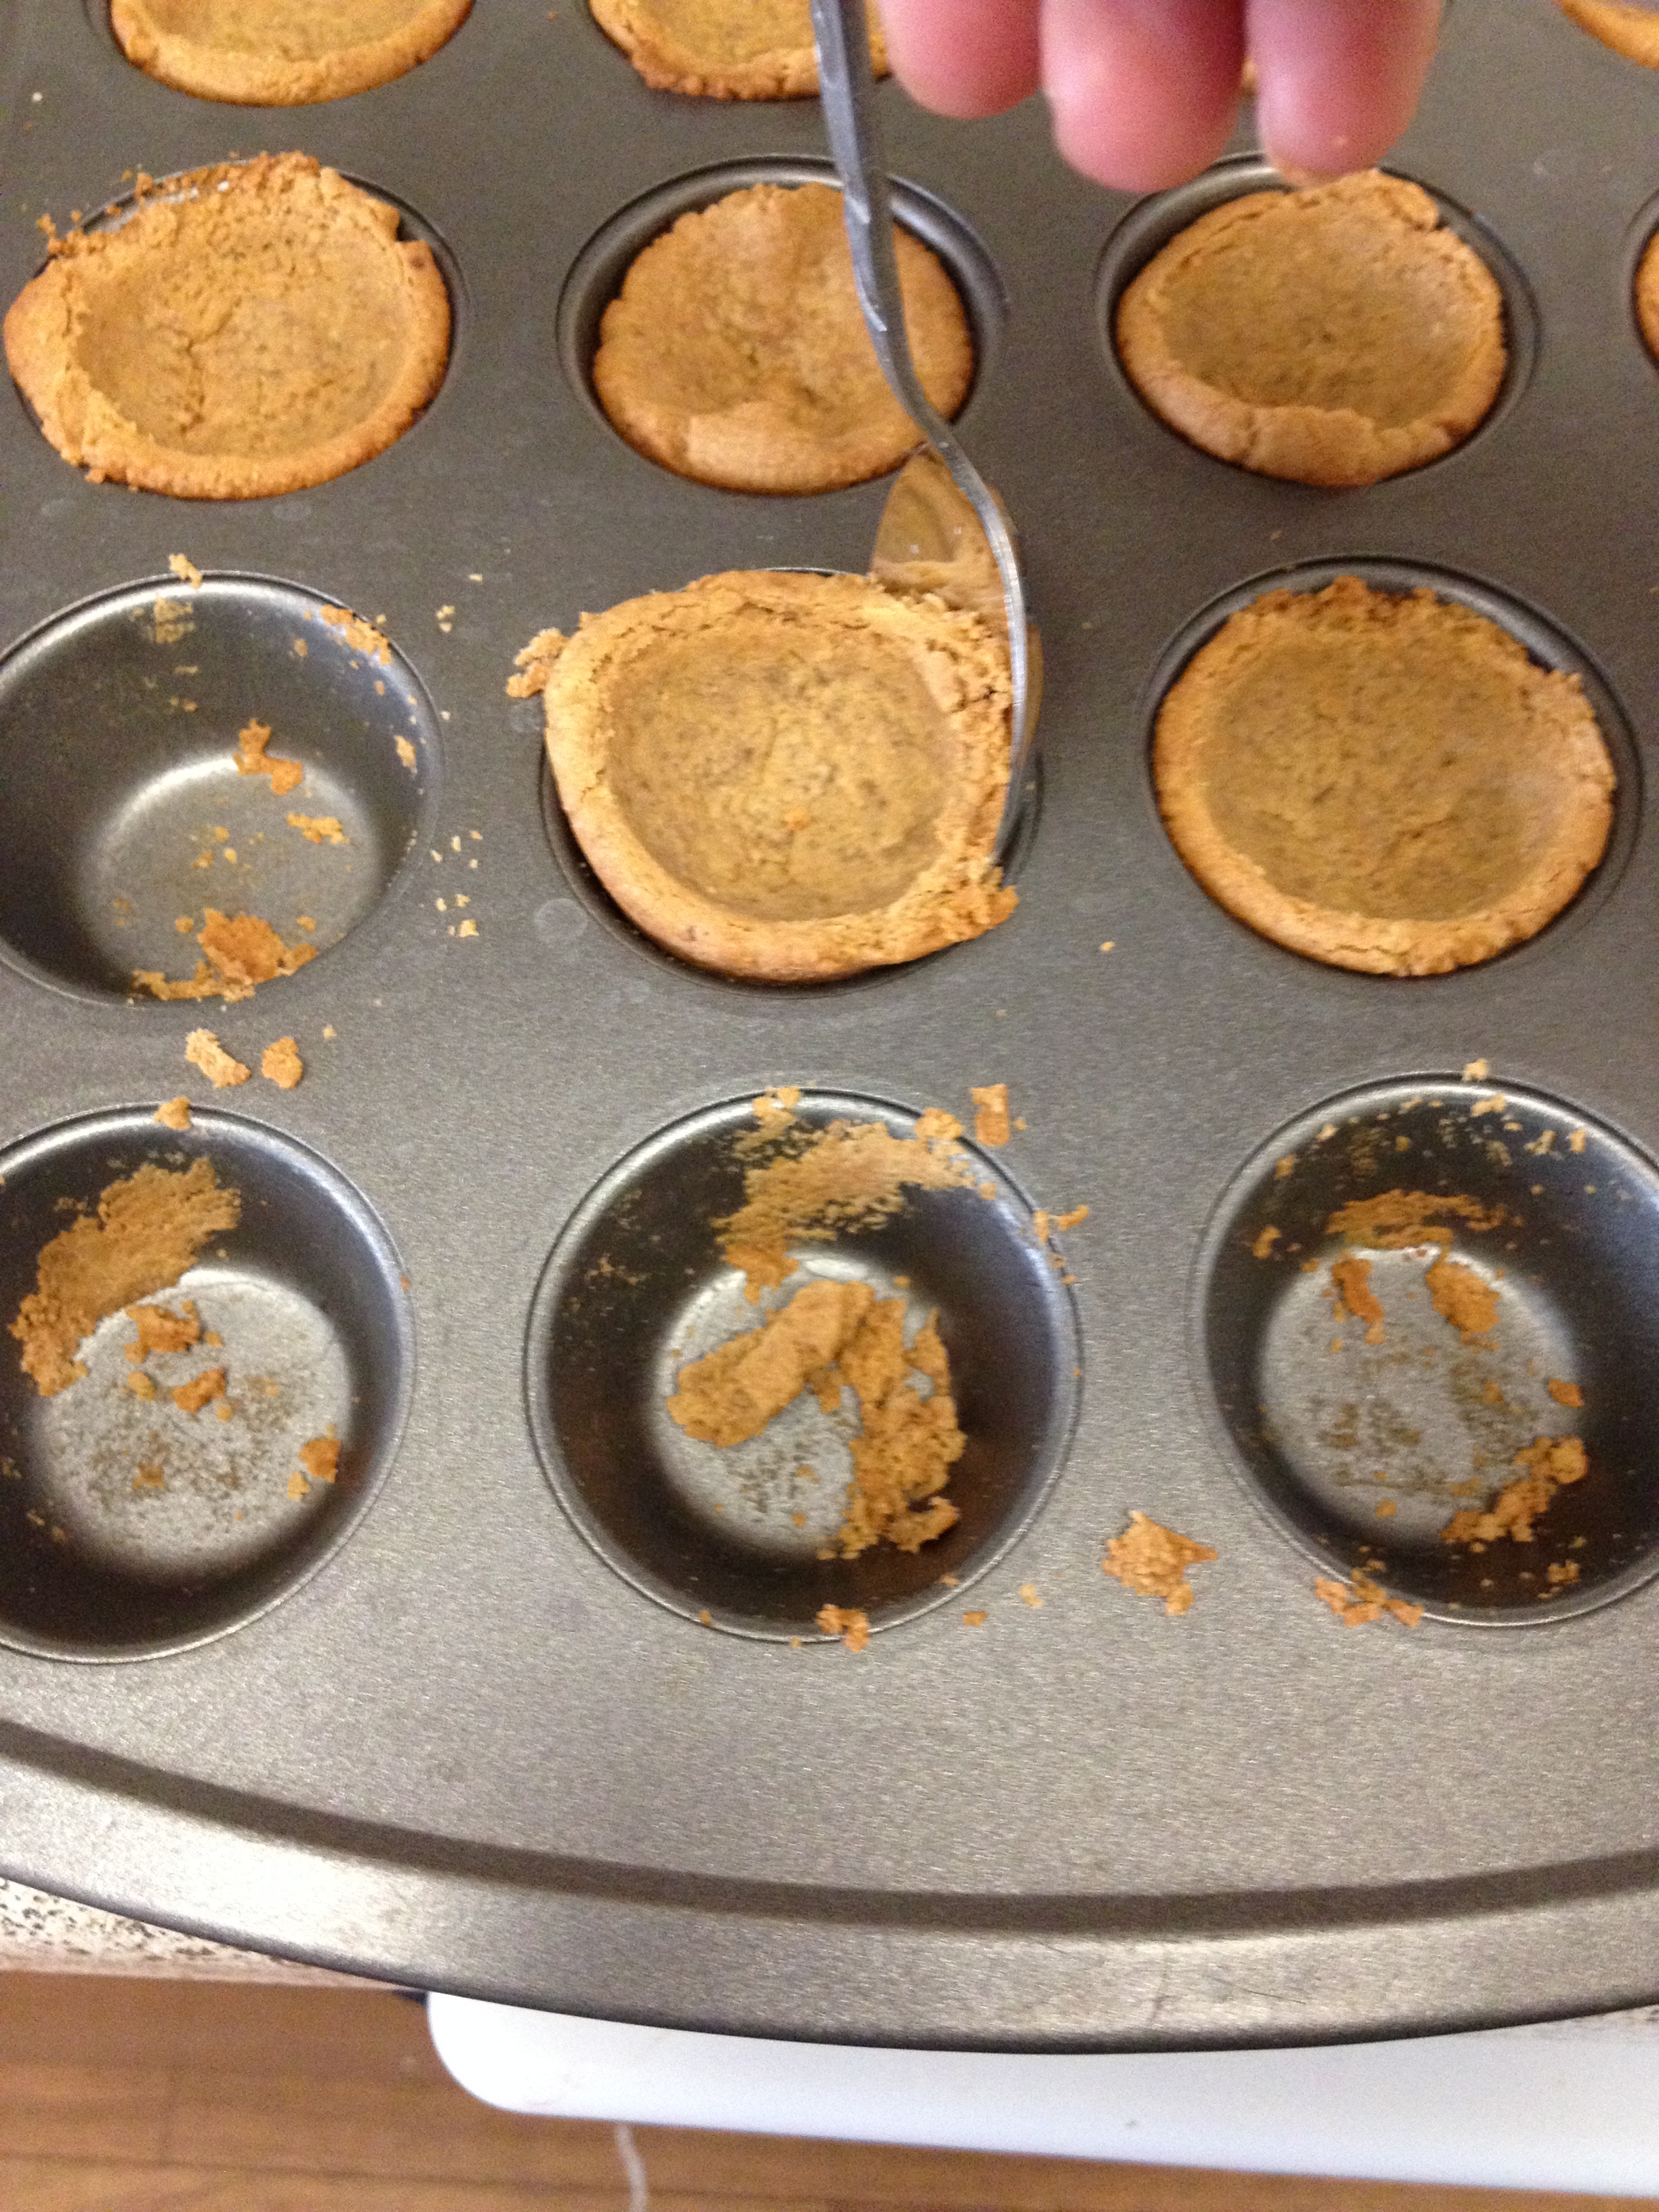
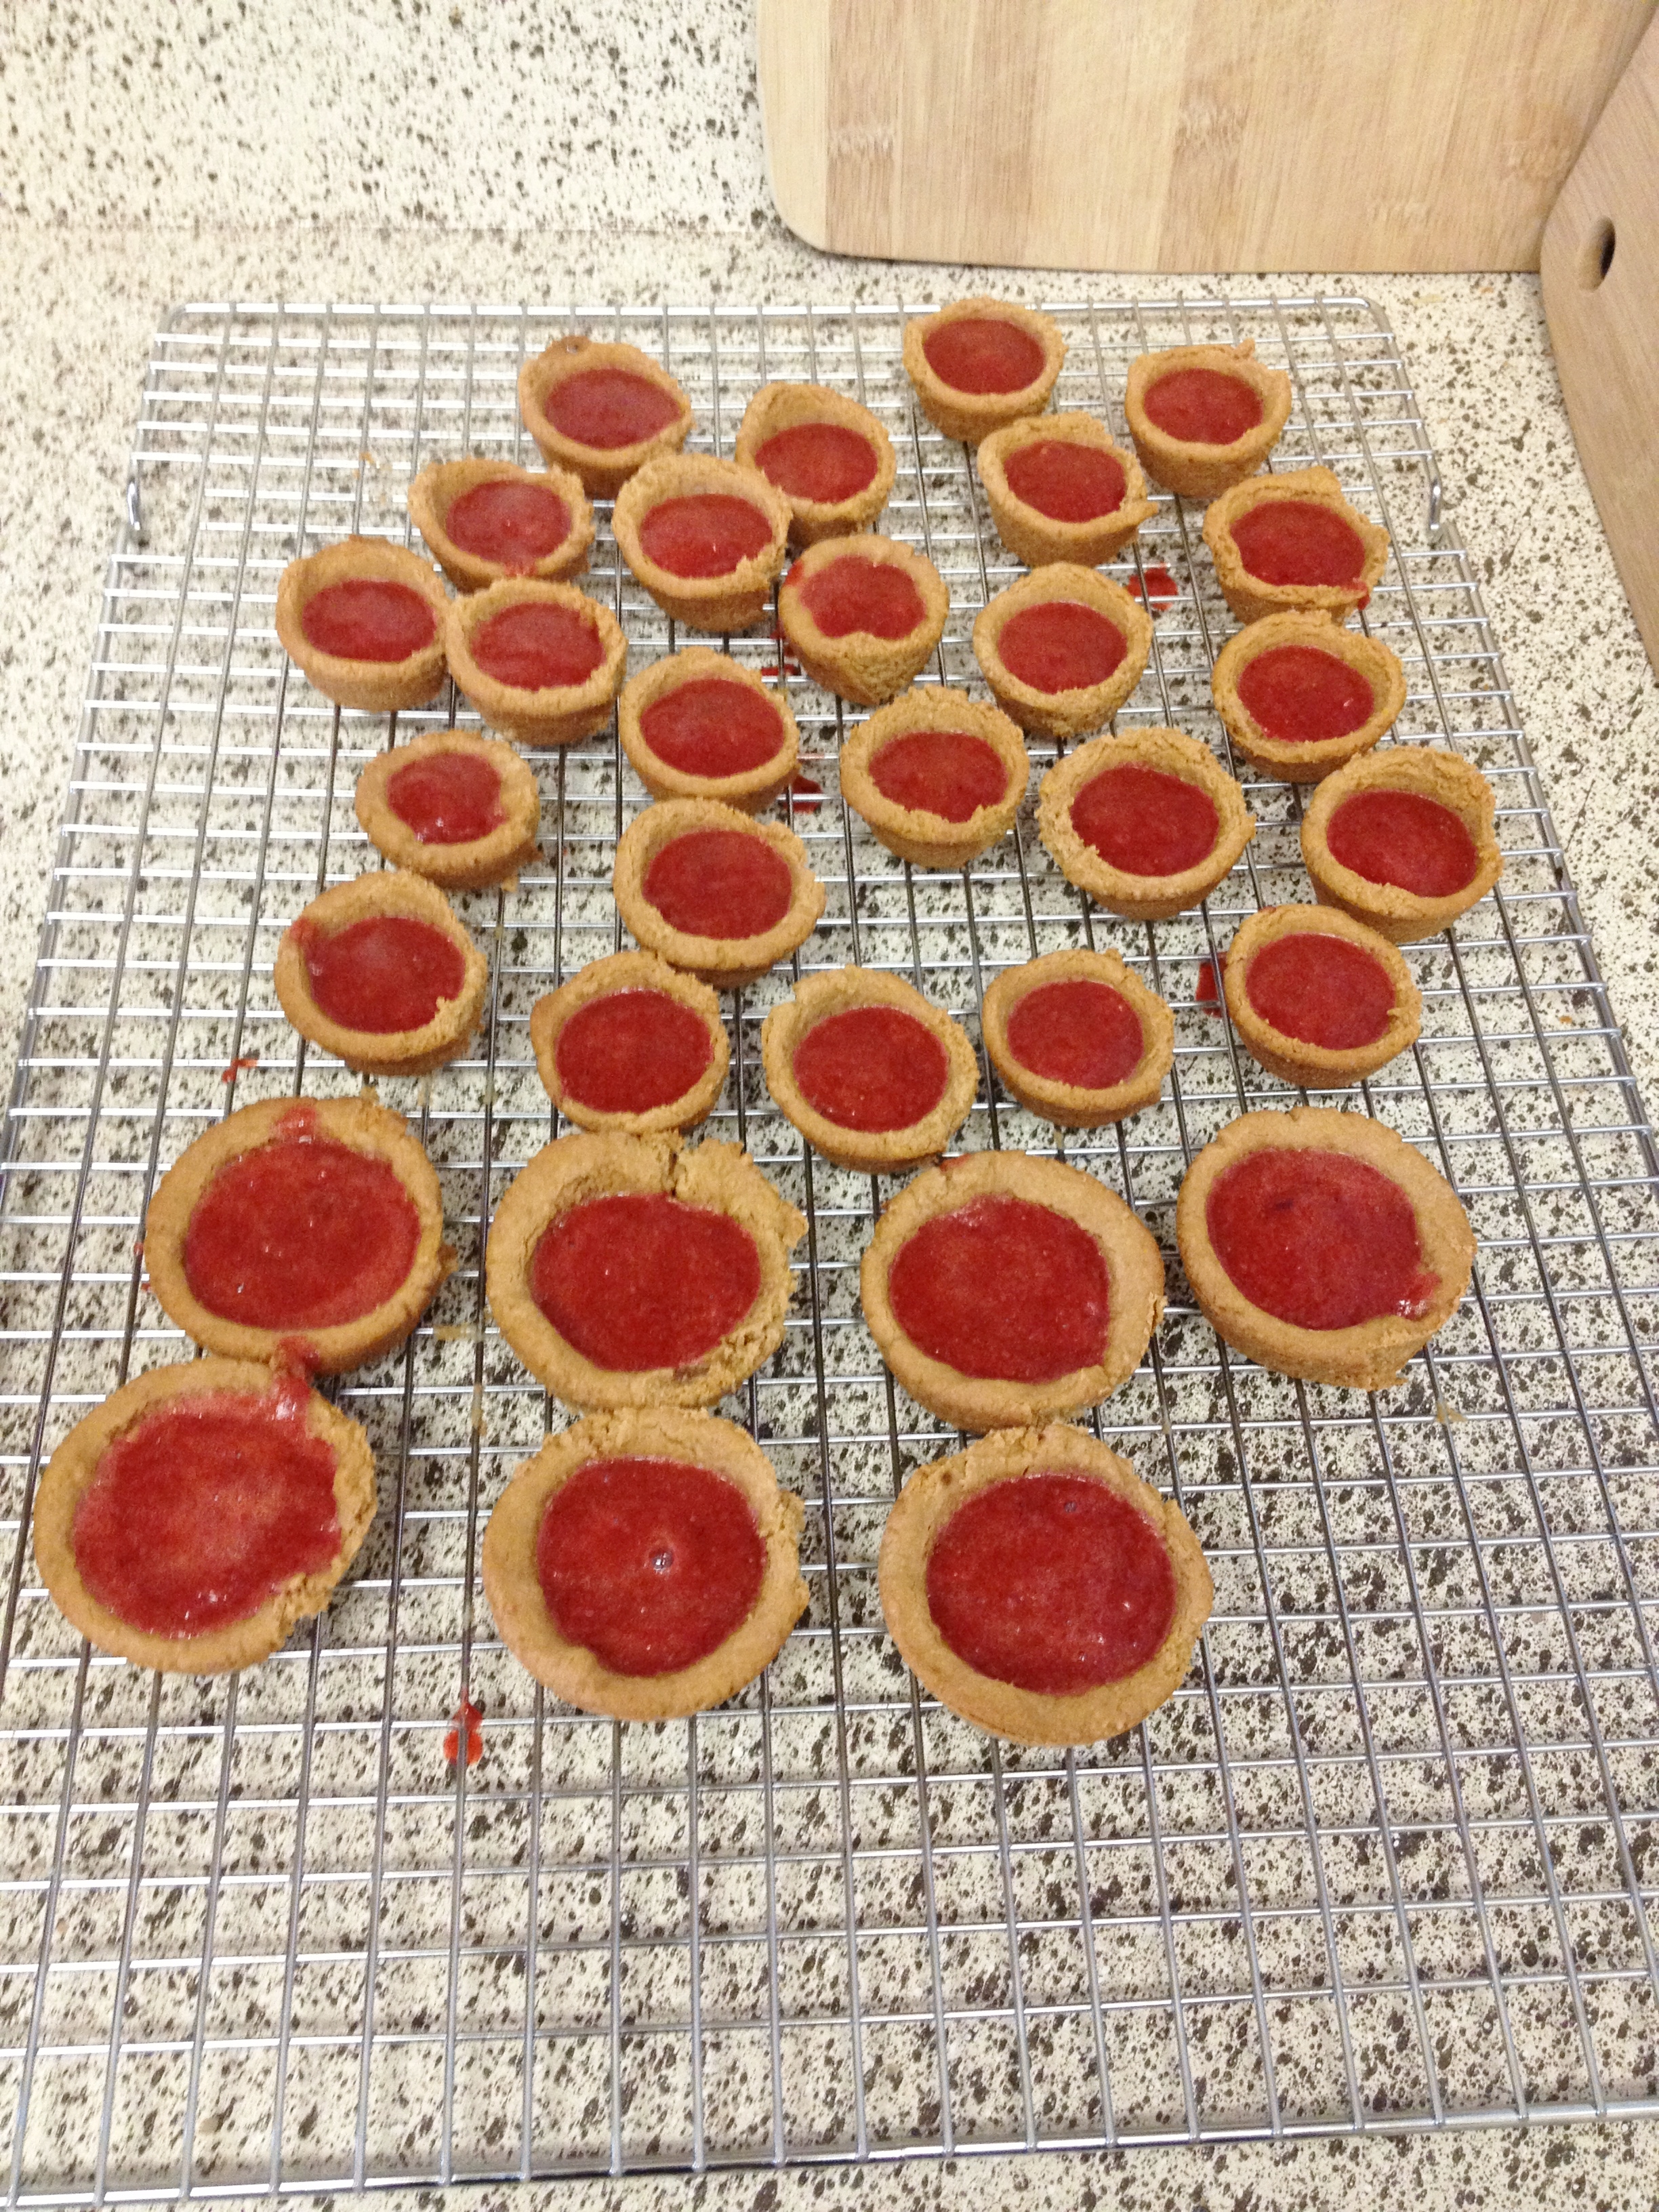
The cookie batter was the simplest part (and quite tasty, since I of course had to test it to make sure it was good!). I had wanted to do something cool with the batter, make a cup of sorts (like a tart as my oldest nephew and wannabe chef said). I figured the easiest way to do this would be to roll the batter into one-inch balls and then press them into and up the edges of the mini muffin tins. As you can see from the pictures above, it started out great but when baked the middle puffed up (the last pic). Below you can see that I used my super-cool round tablespoon to press the middles in so they were perfectly round. They had to cool almost completely before carefully spooning out, so I used the last of the batter in the bigger muffin tin and made semi-bigger ones, doing the same thing of rolling, pressing, and pushing.
 ~
~
~
“
~
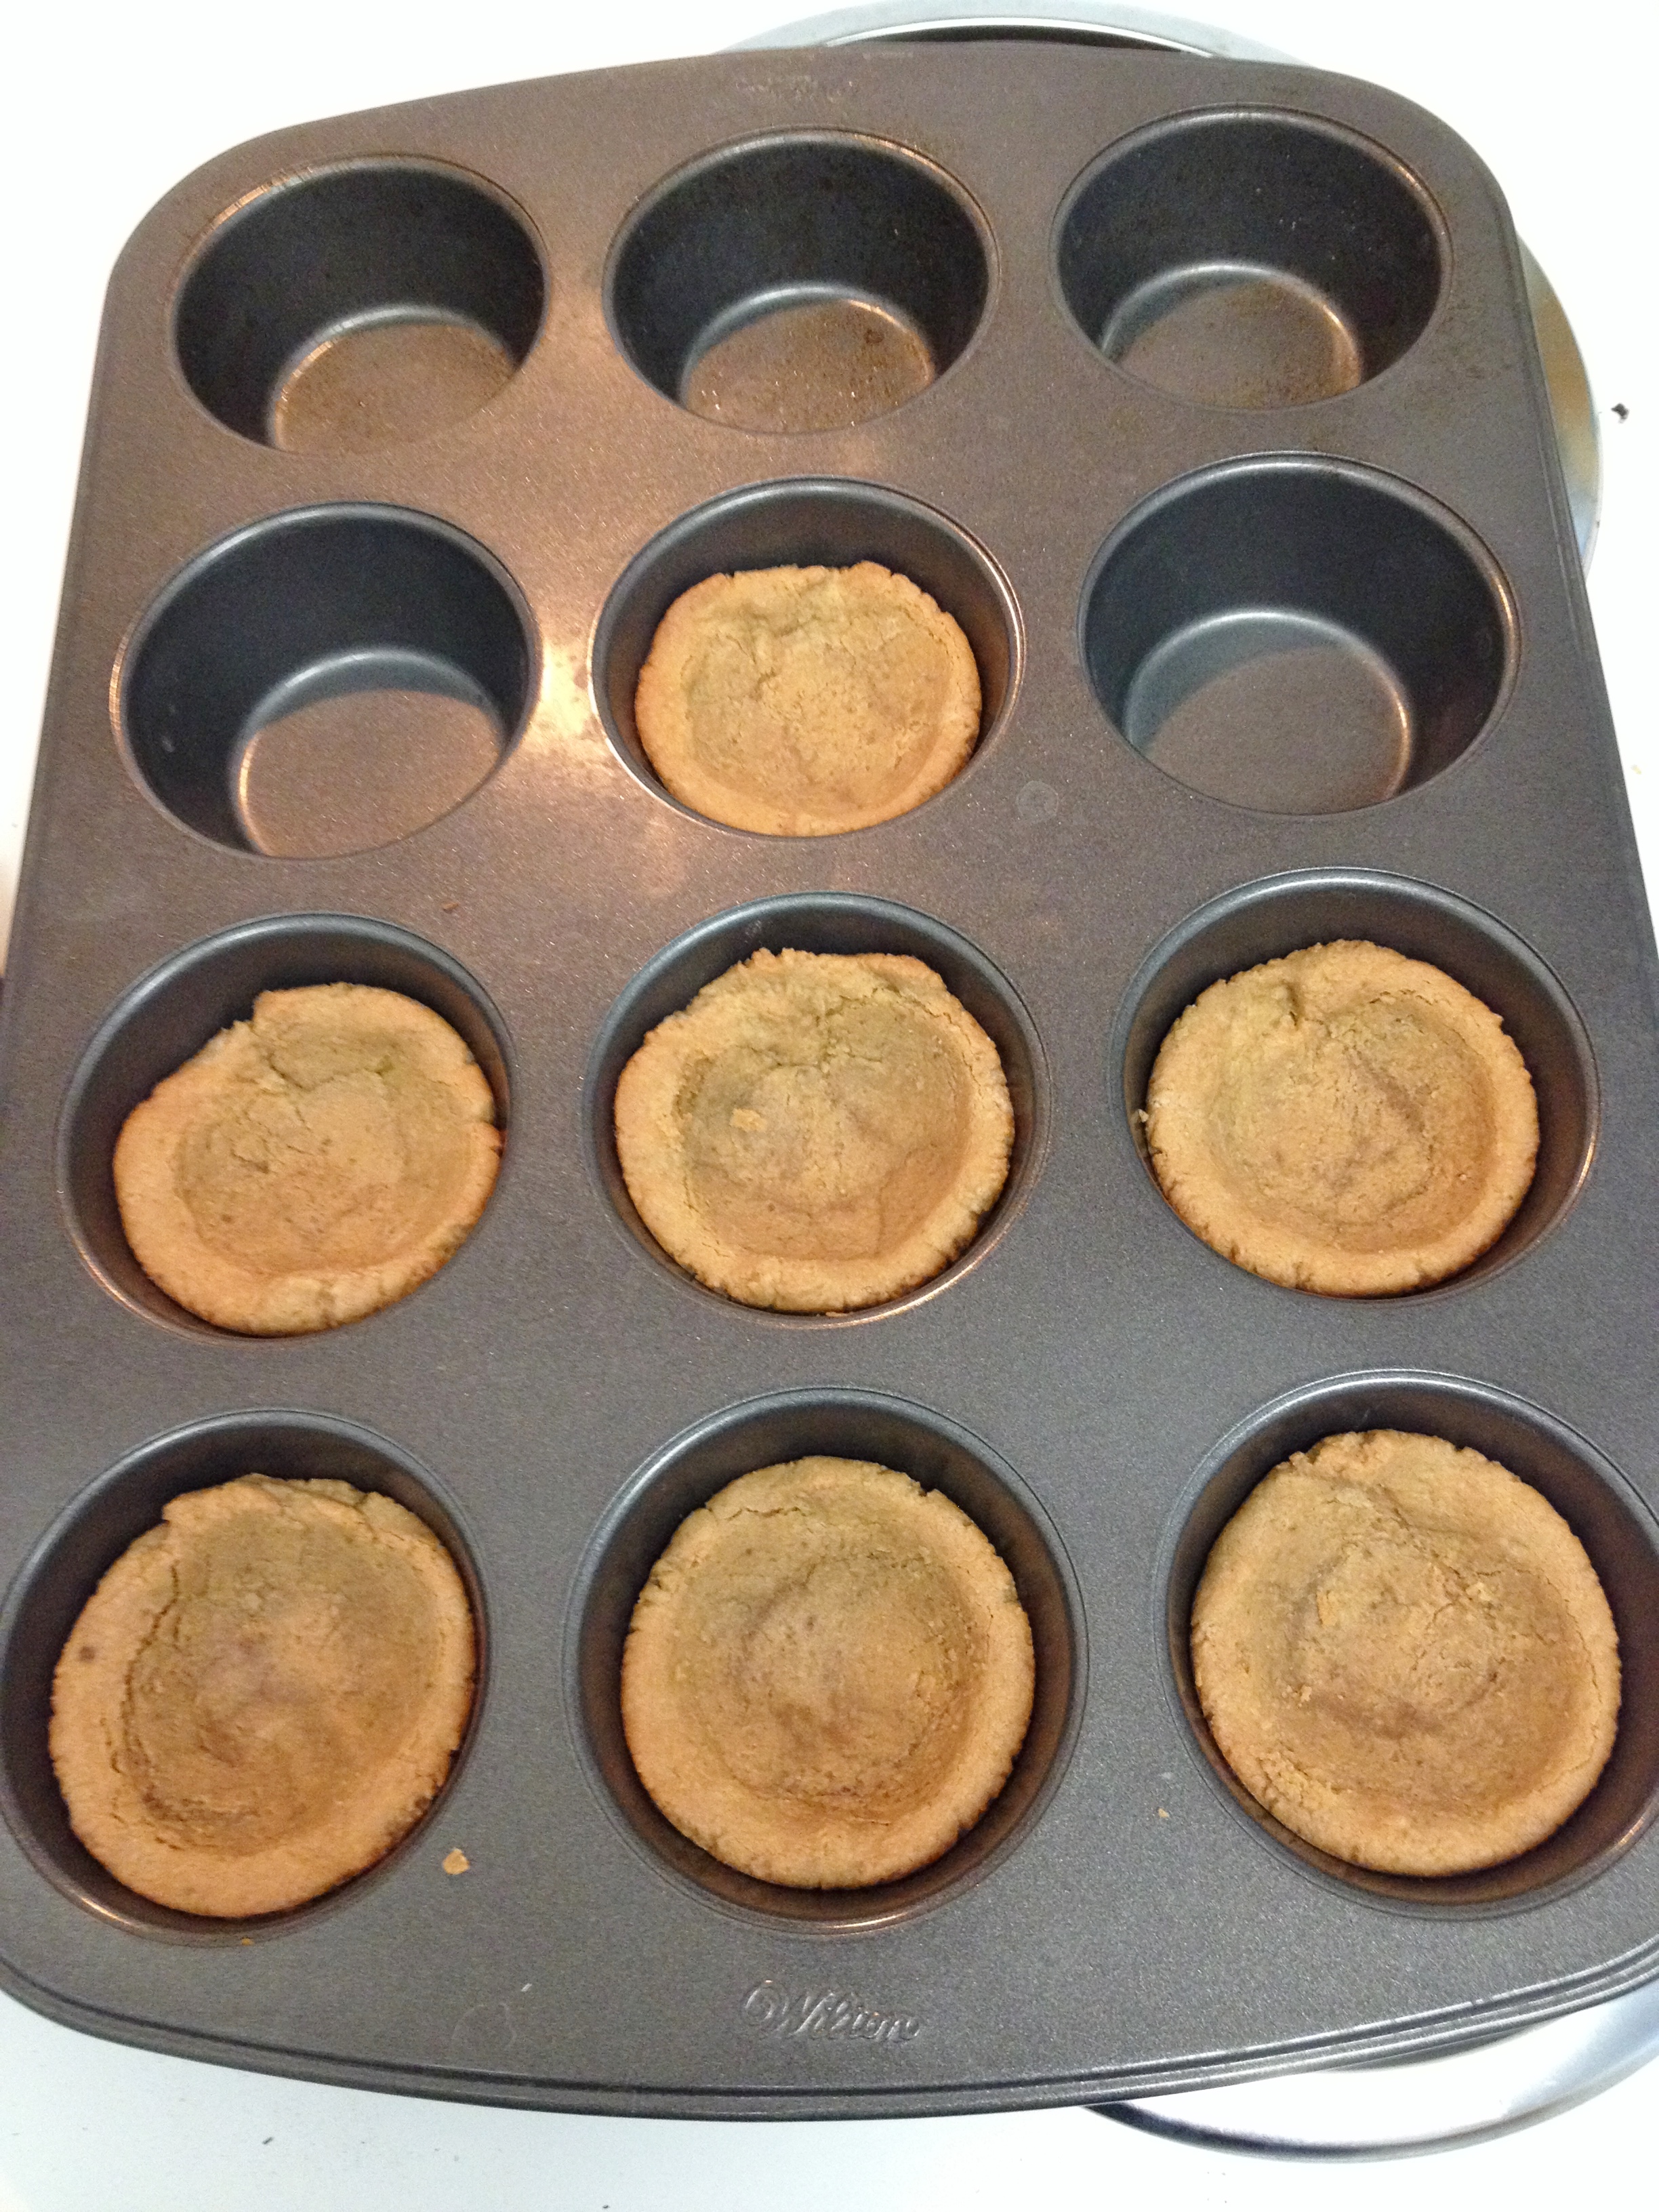
These cookie-tarts turned out very fragile, so be extra careful when getting them out of the tins. Wait until they are almost completely cool, then use a smaller spoon to gently press down the sides and kind of wiggle them out. Lay them on a cooling rack so they are ready for when you pour in your jelly. Now you could use ready-made jelly or jam, but I so much prefer making my own. This recipe makes a lot and you only need maybe a half cup for this, but the leftovers are amazing…by the spoonful. Yes, I eat my homemade jelly by itself – who needs bread! You can find my jelly making instructions here.

~
~
~
~
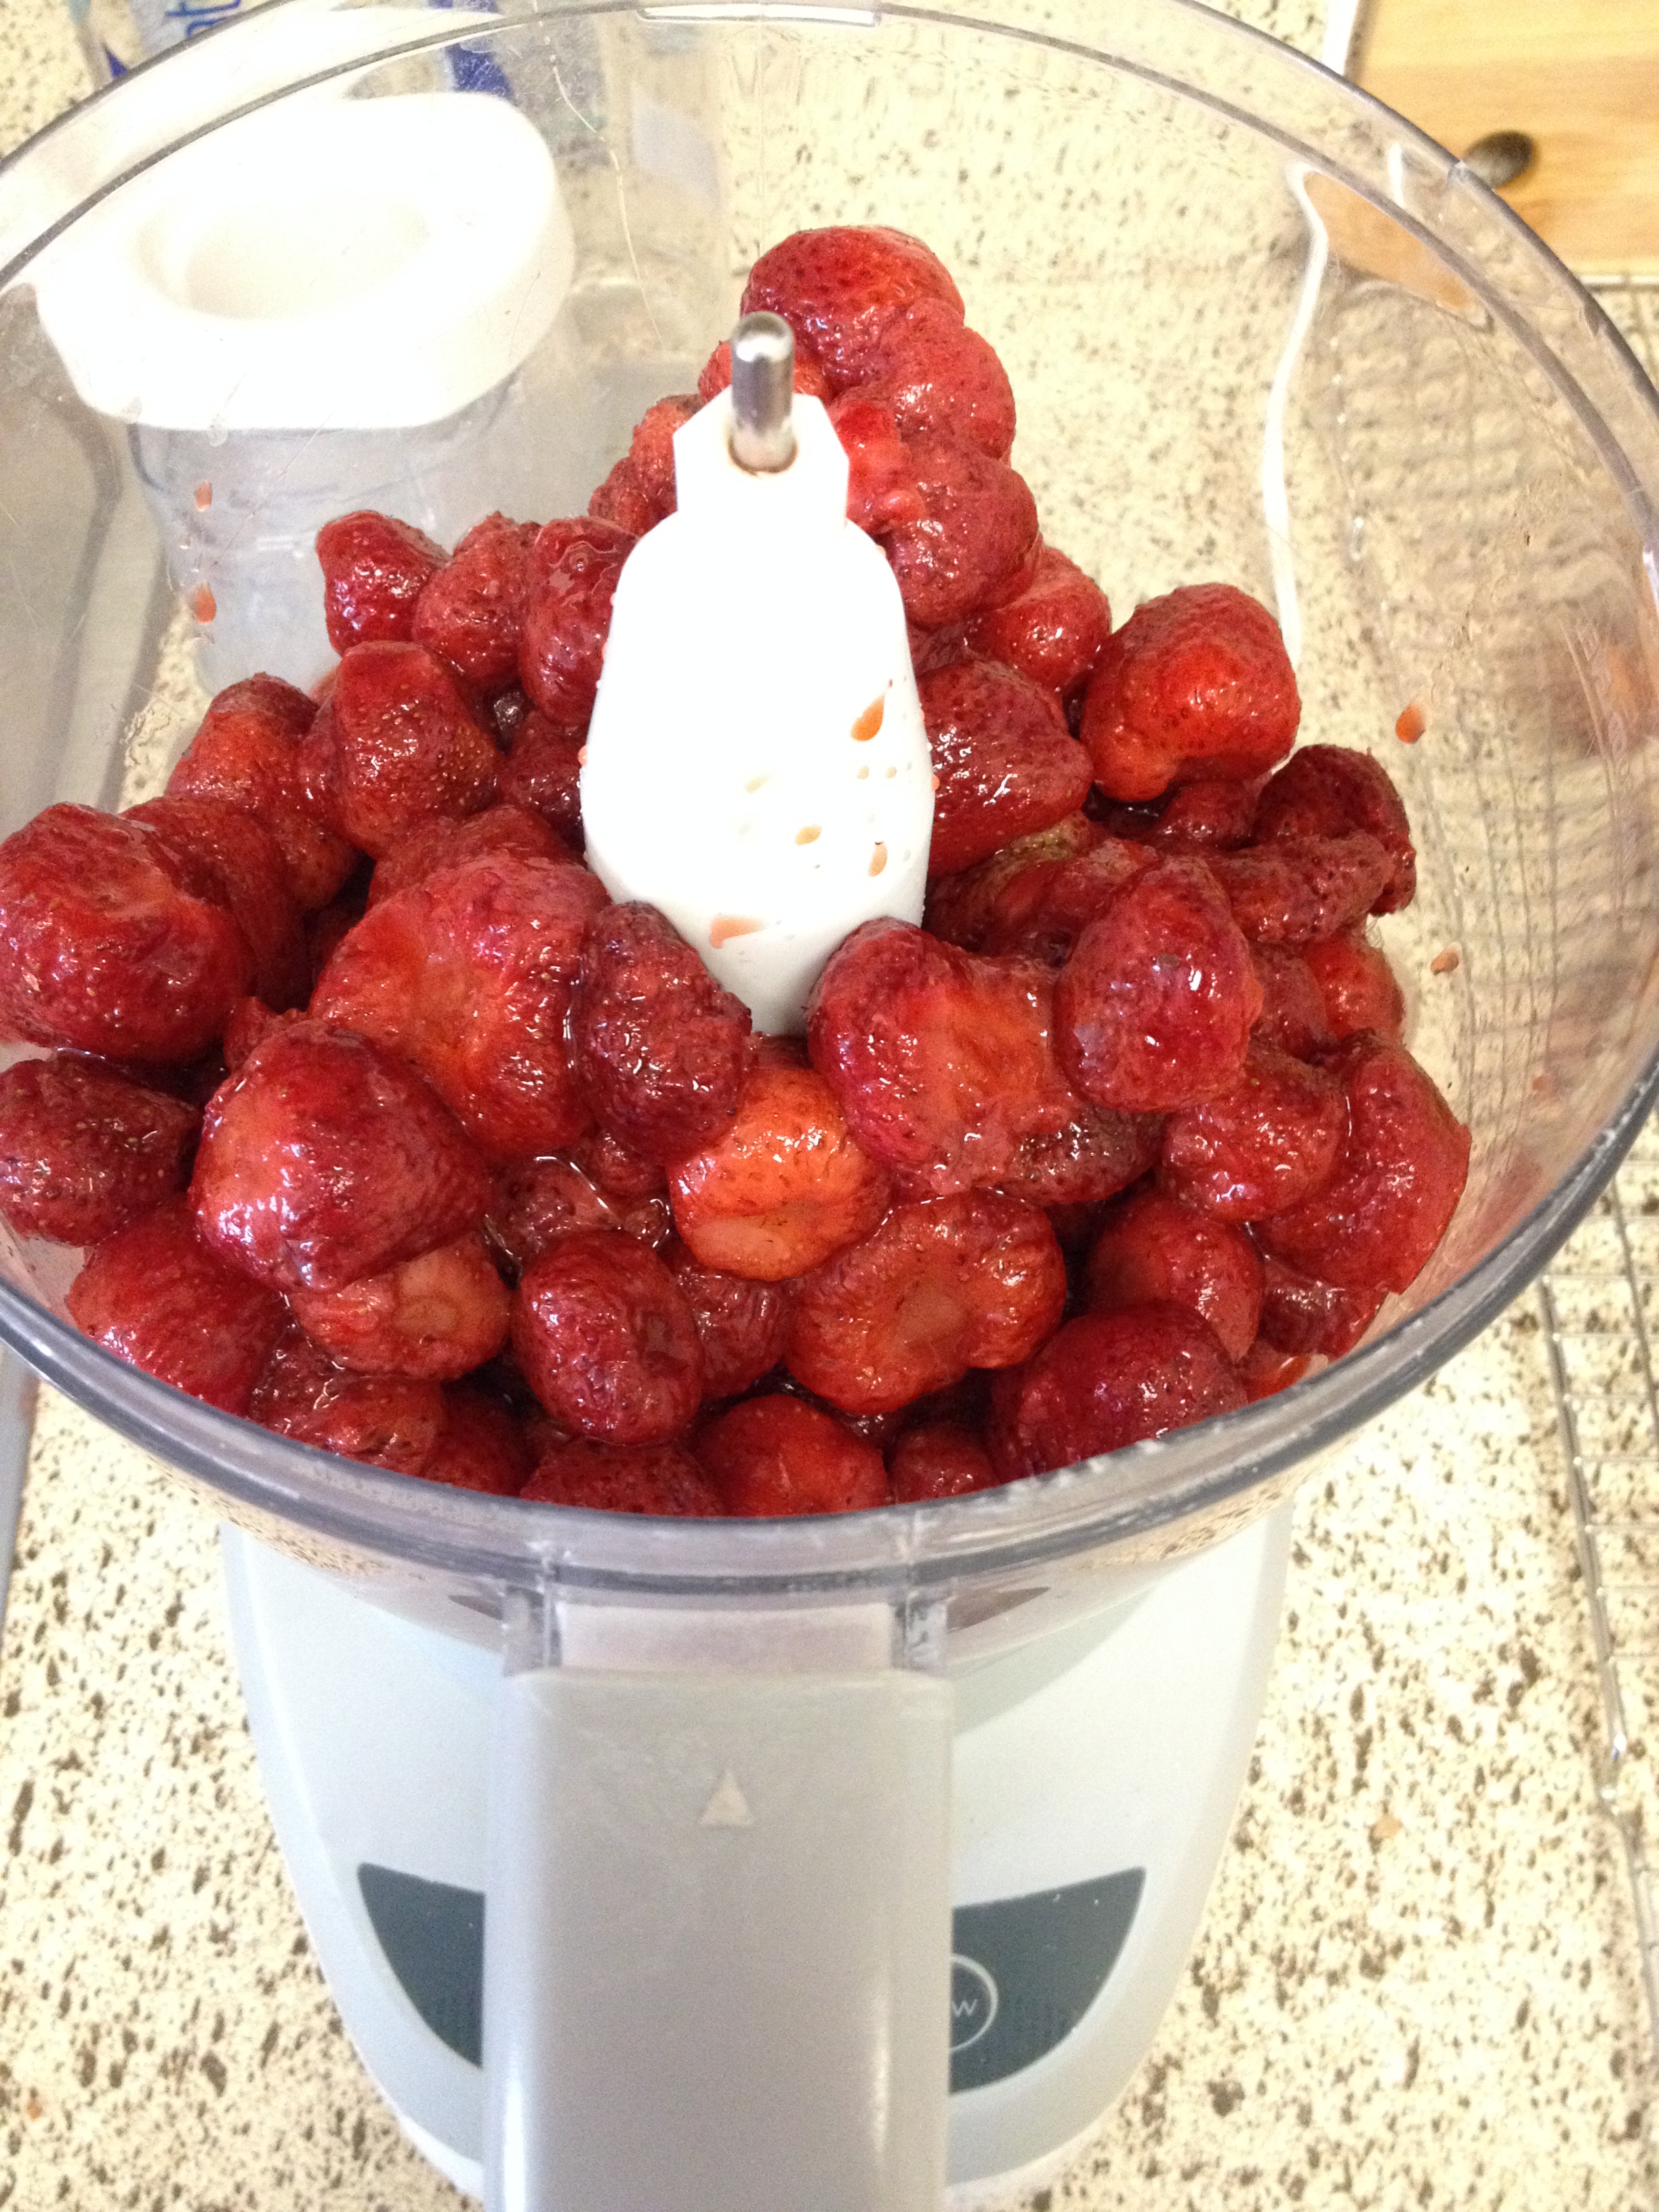
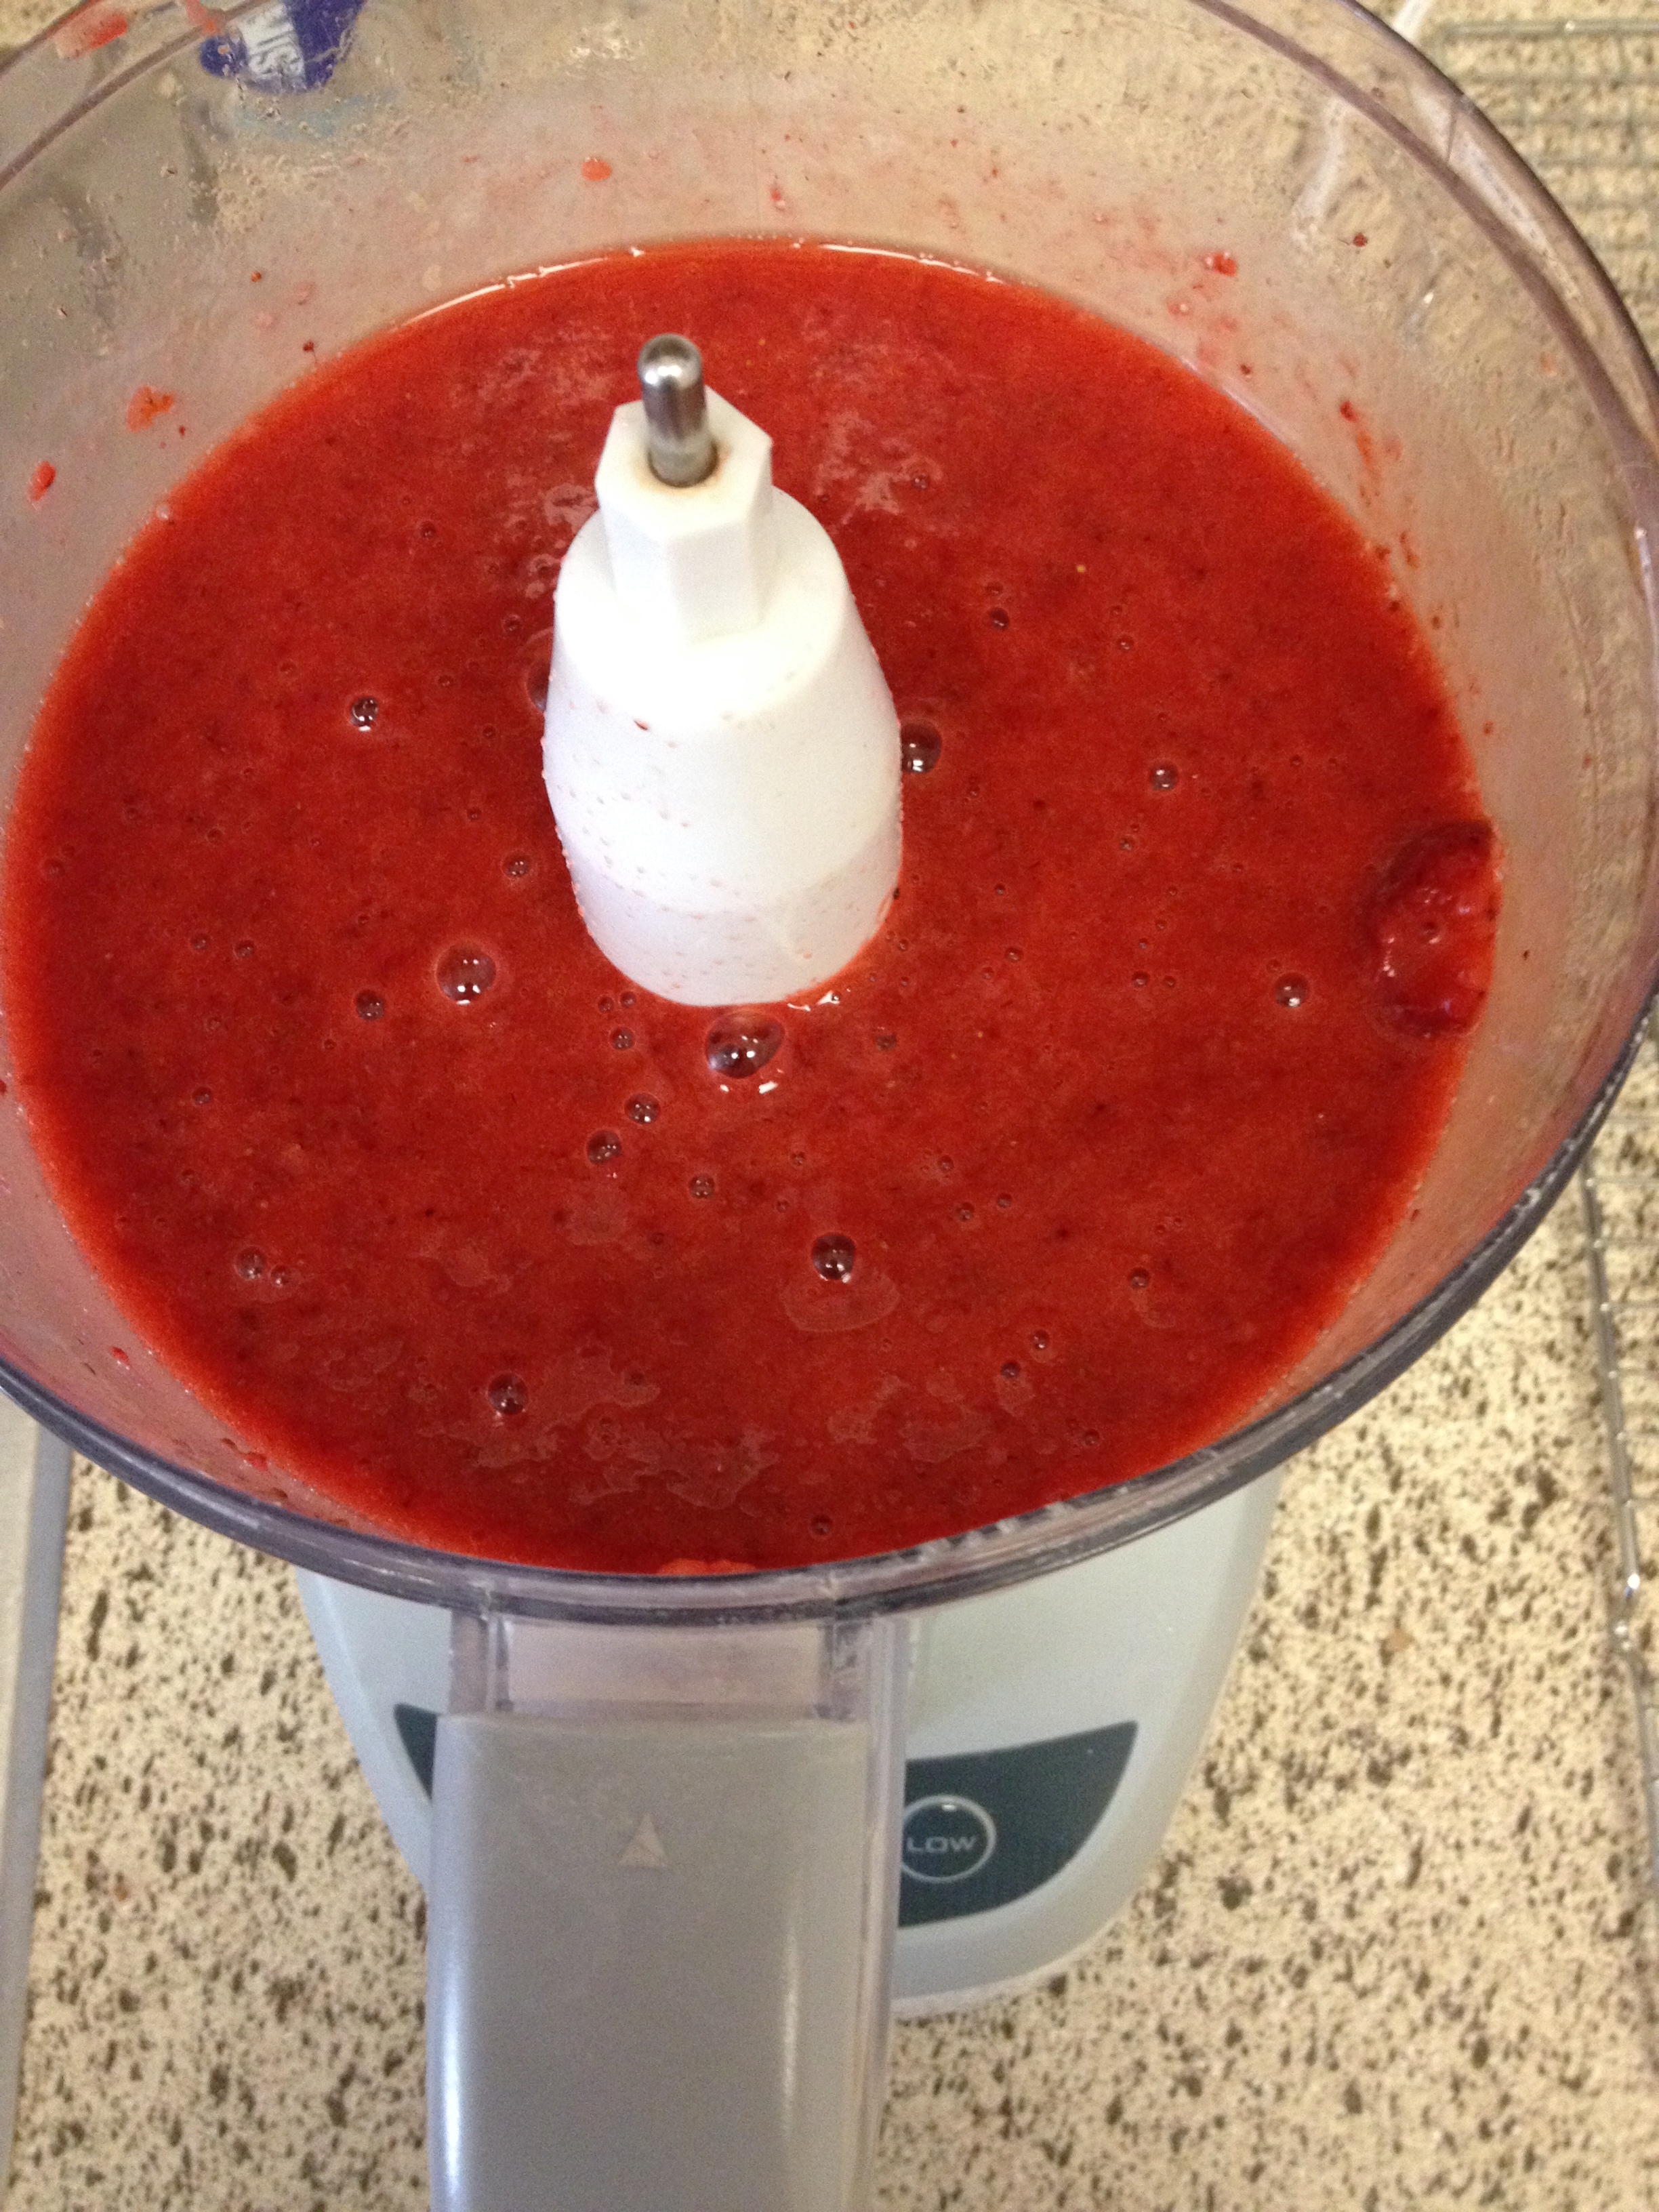
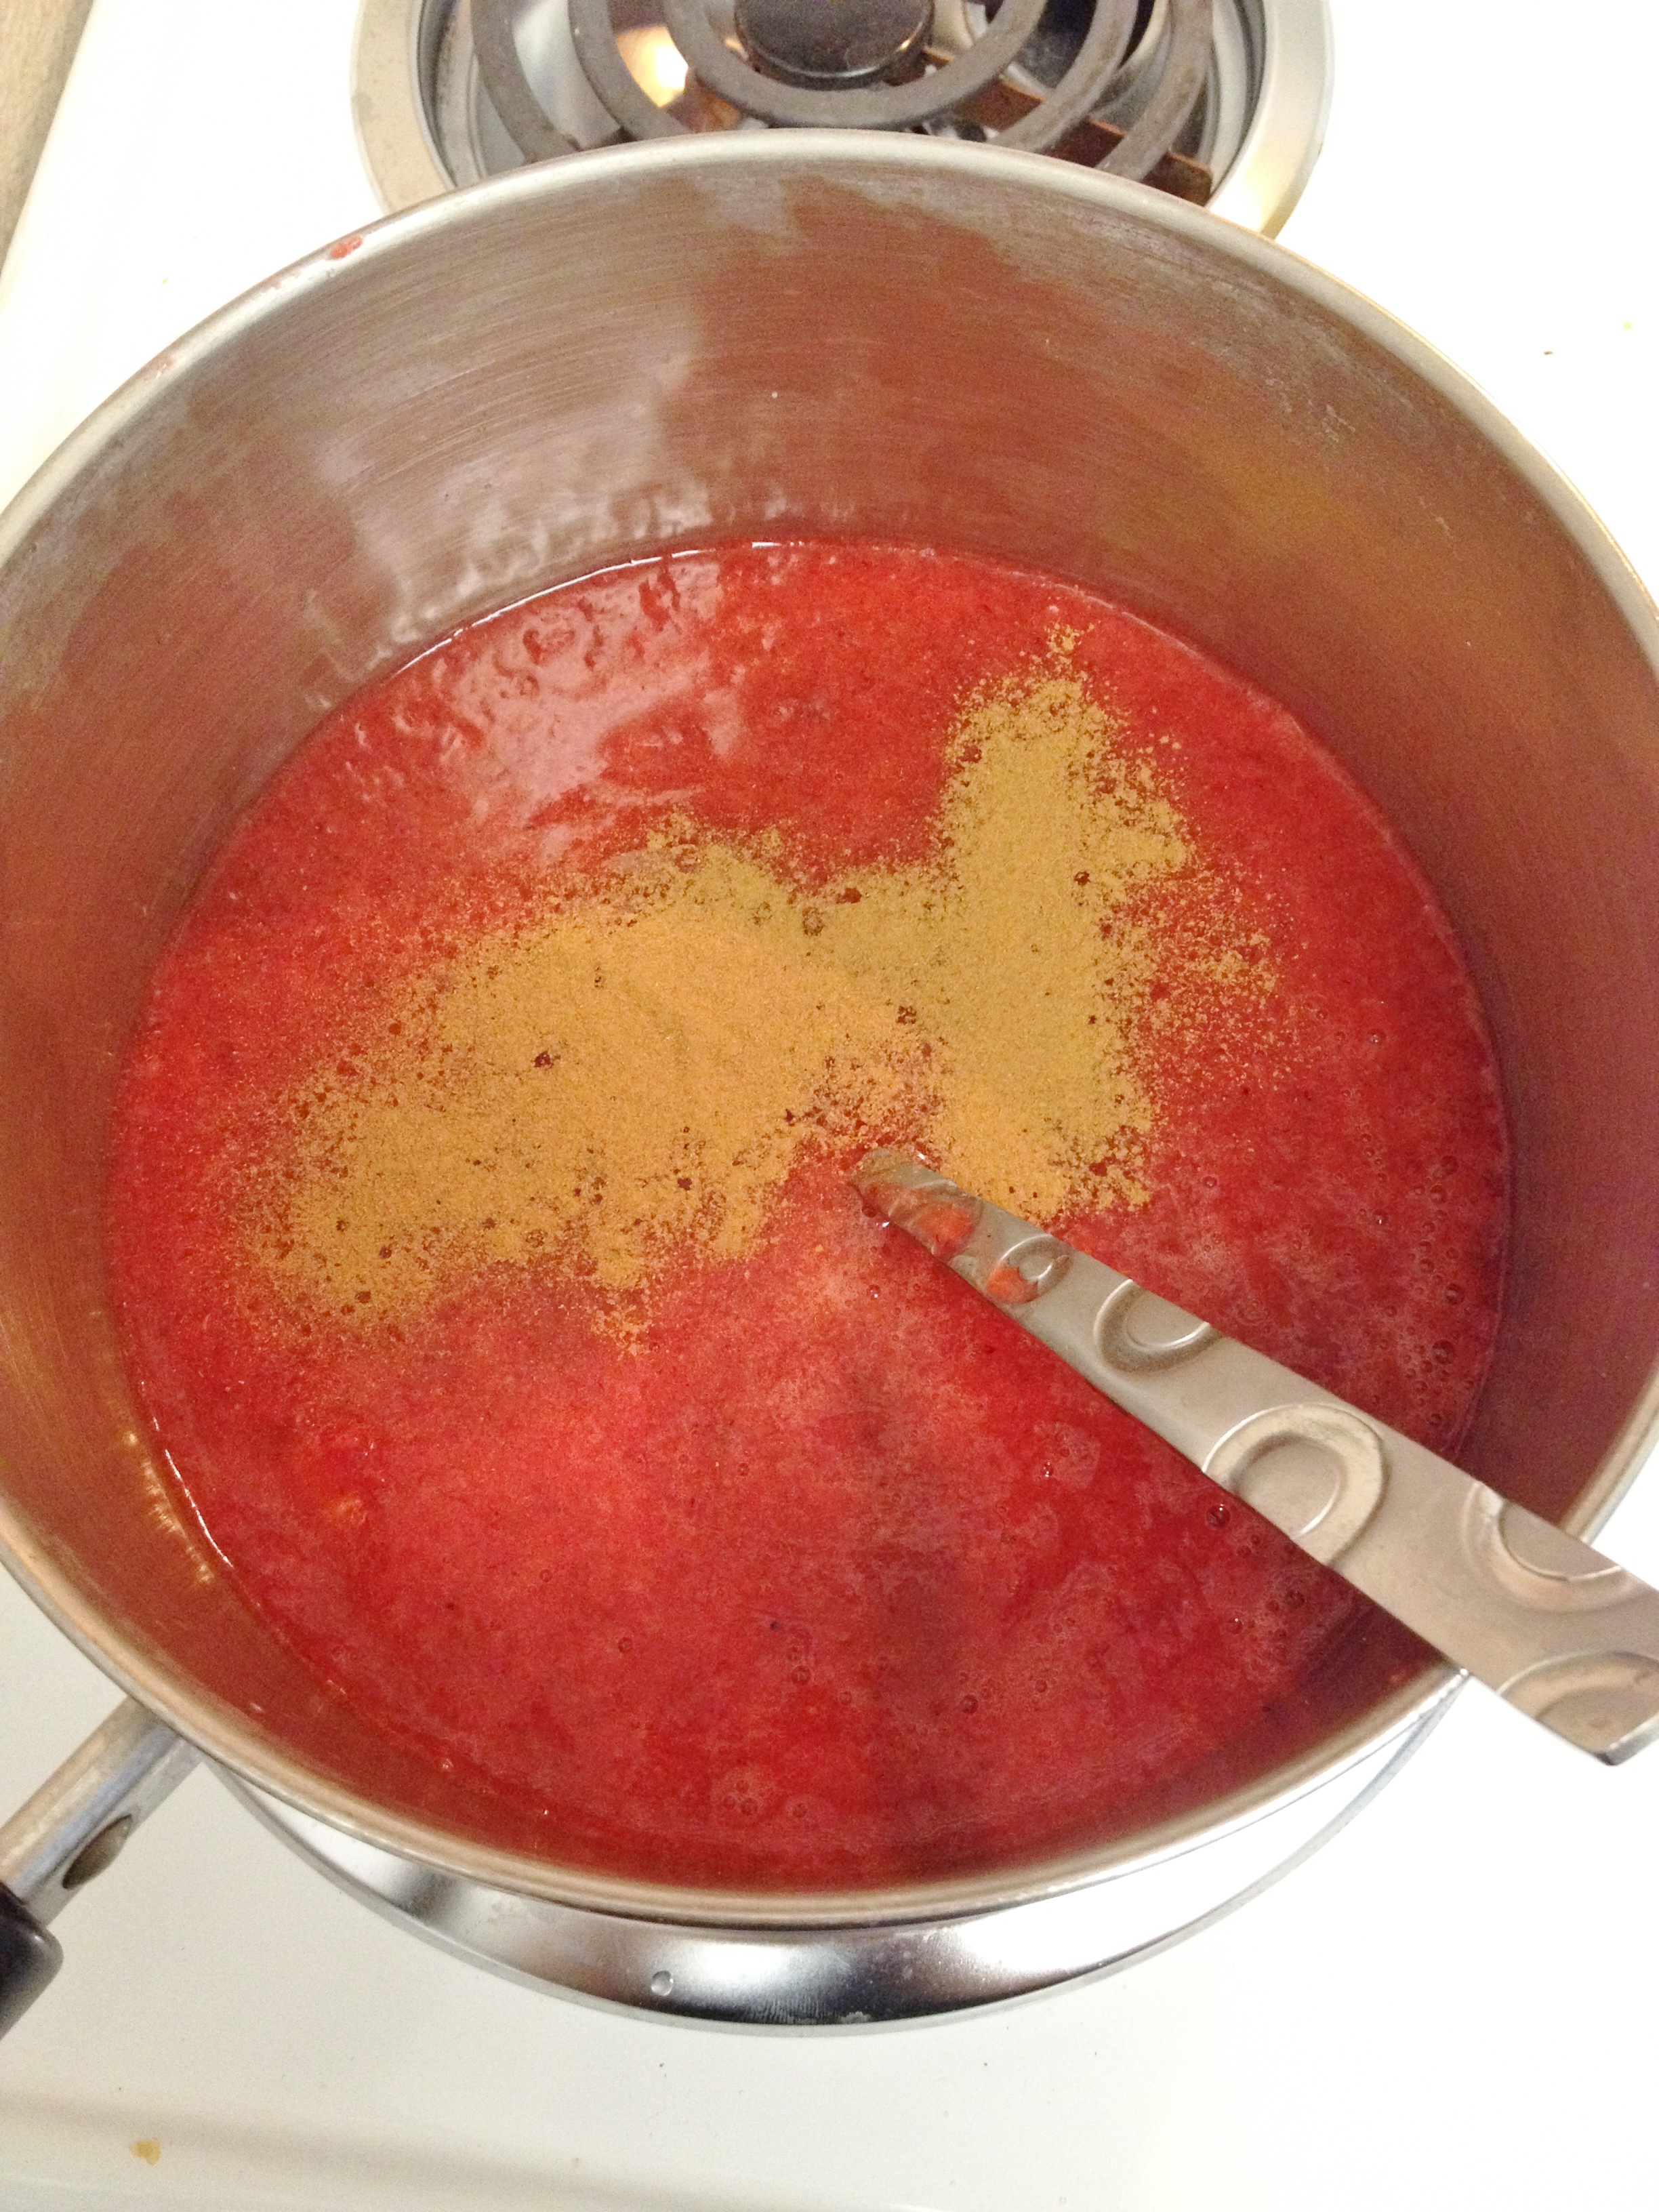
I defrosted the strawberries while making the batter, 2-3 minutes at a time until almost completely thawed. After all cookies were baked I poured the berries into my food processor until they were completely liquefied (except for that silly one on the side that did not want to cooperate). Next pour strawberries and other ingredients into pot and make jam. Waiting until after the cookies are baked ensures they are cool by the time the jelly is done; set jelly to the side while wiggling your cookies out. Using the same small spoon used to take cookies out of tins, carefully spoon up and pour the liquid jelly into the cookie-cups. Once all filled, refrigerate until jelly is solid. I made mine and let them set overnight, but it should only take around 3 hours.
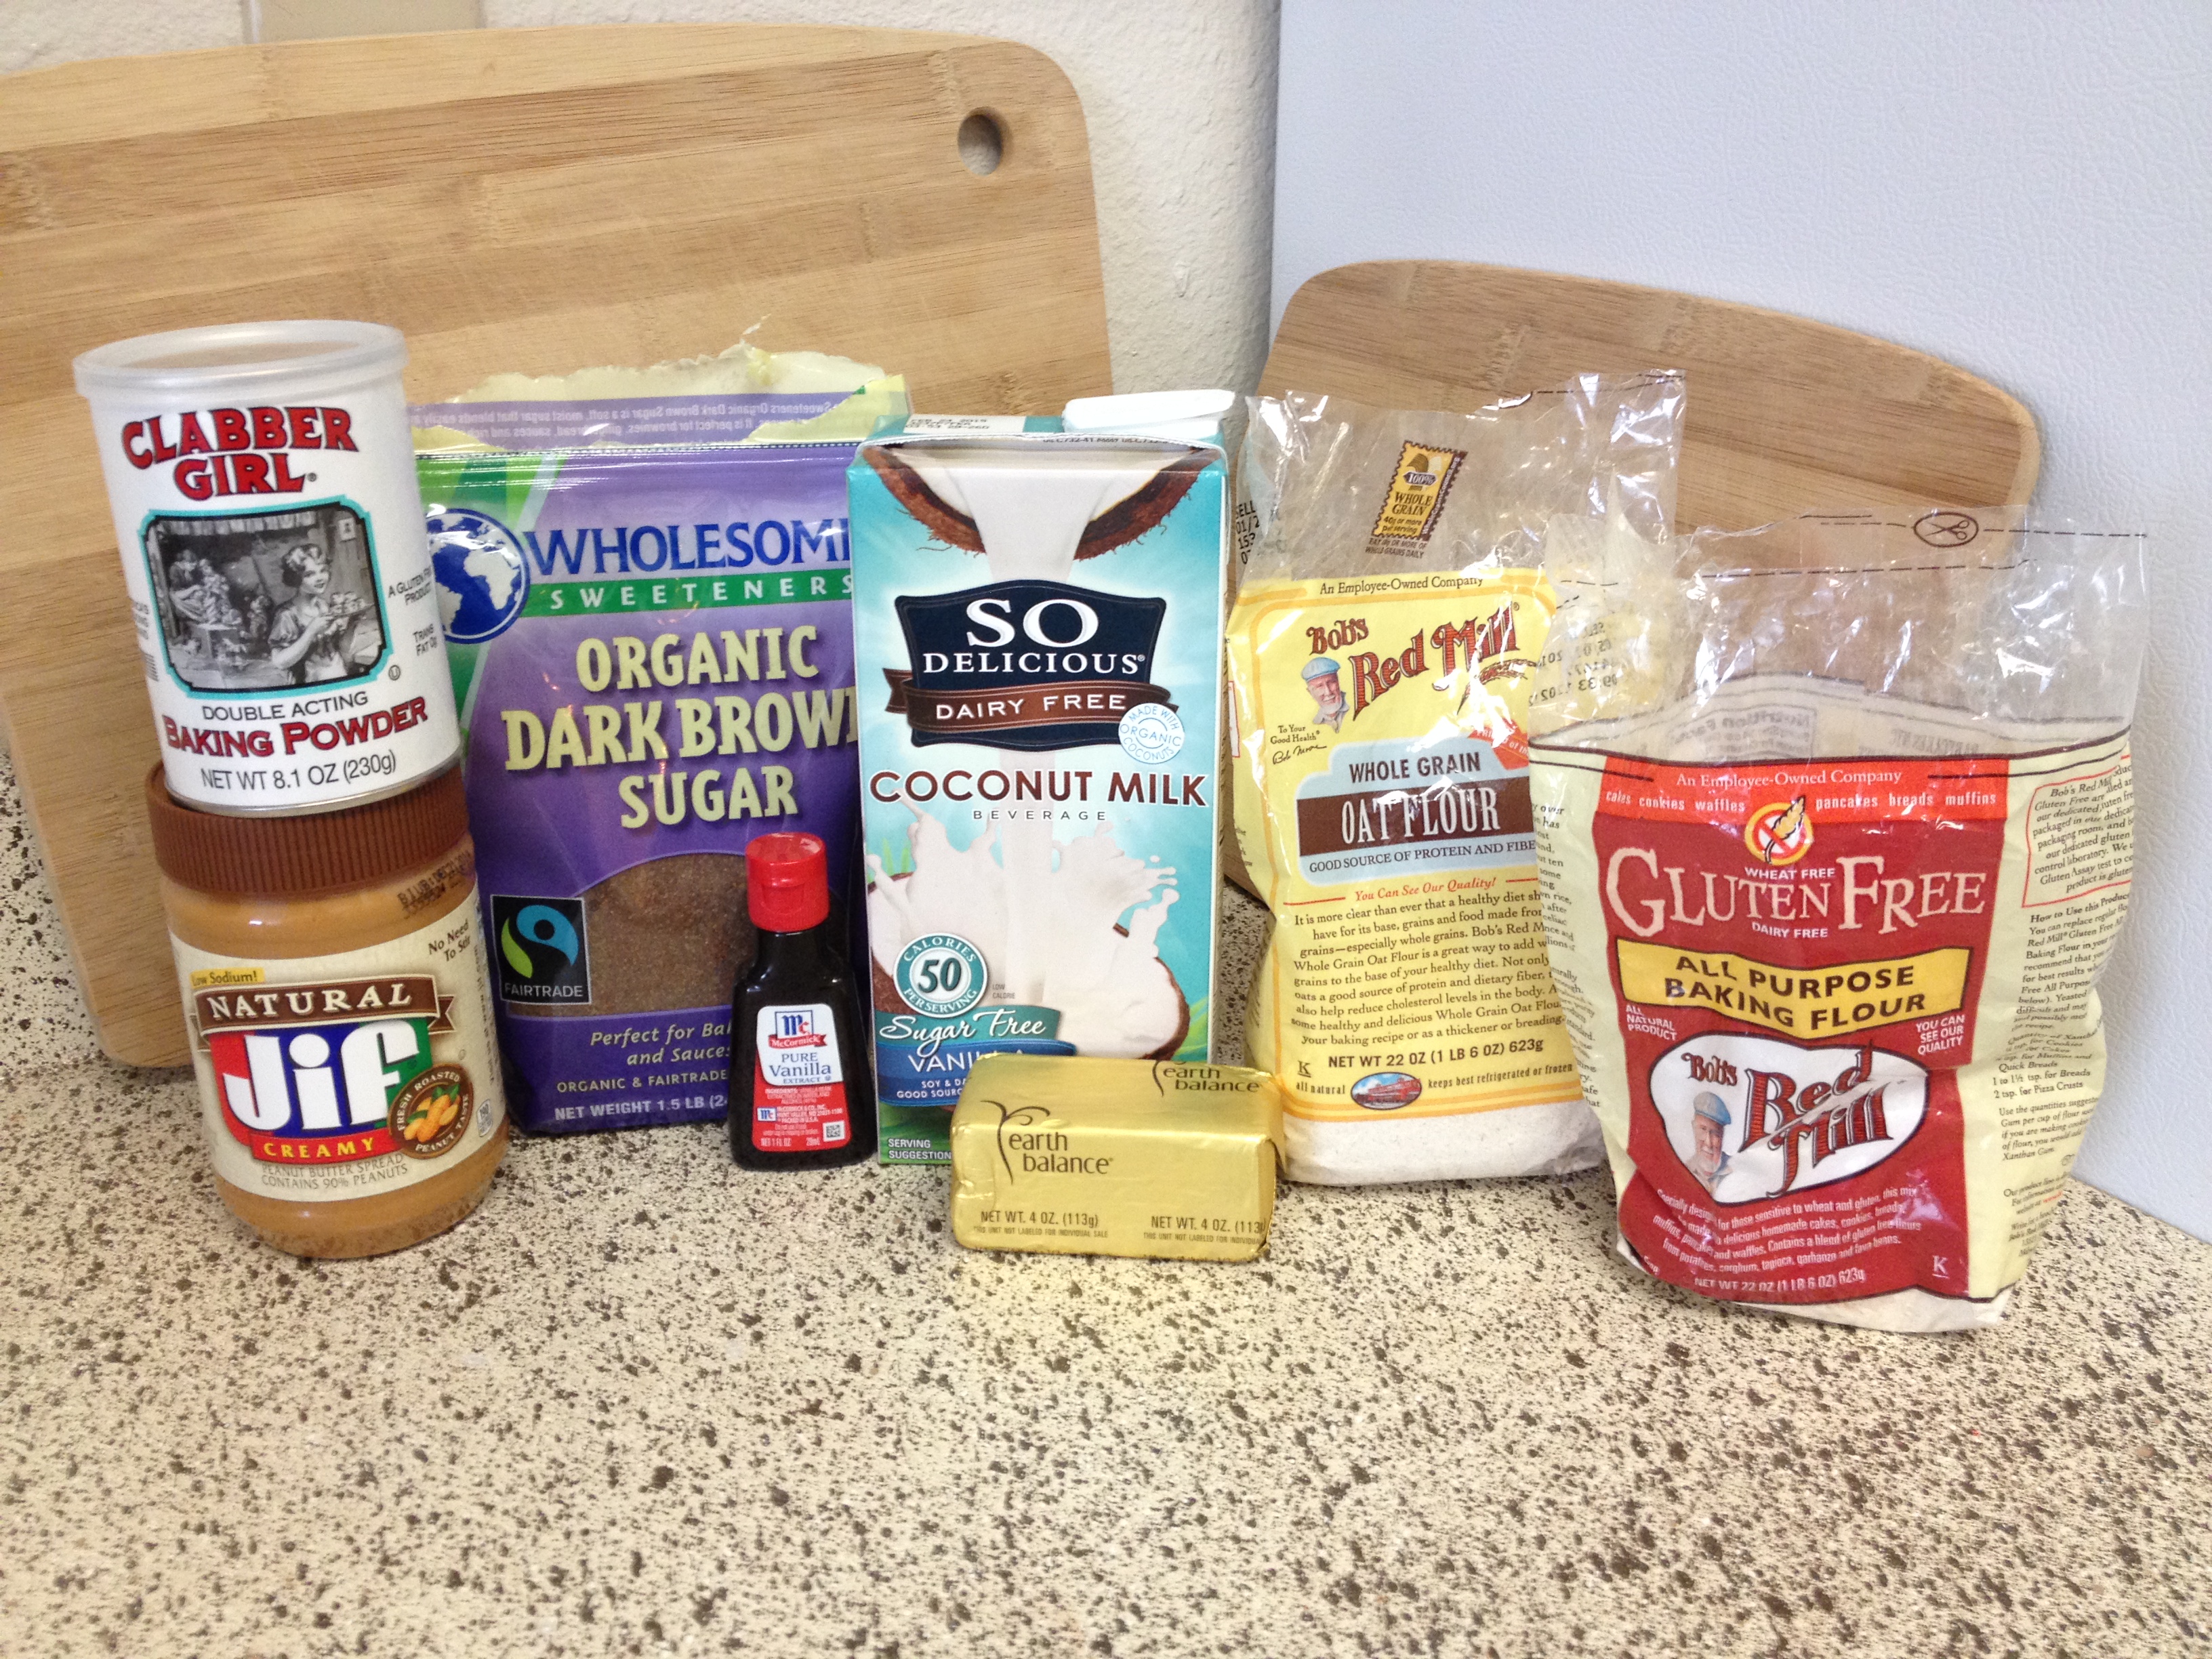 Peanut Butter Cookies, 24 small & 7 big
1 C Jif Natural Creamy Peanut Butter
1/3 C Earth Balance Butter Sticks
1/2 C Wholesome Sweeteners Brown Sugar
1/4 C So Delicious Sugar Free Vanilla Coconut Milk
1 Tsp Vanilla Extract
1/2 Tsp Baking Powder
1 C Bob’s Red Mill Gluten-Free All Purpose Flour
1 1/2 C Bob’s Red Mill Oat Flour
~~
Jelly:
3 Bags Frozen Strawberries
1 1/2 Tbsp Pectin
1 Tsp Cinnamon
1 Tbsp Lemon Juice
3 Tbsp No-Calorie Sweetener (like Splenda)
1. Set oven to 375 degrees.
2. Pour peanut butter, butter, and brown sugar into large bowl and cream with a hand mixer.
3. Add vanilla and milk and blend.
4. Add baking powder and flours and keep mixing – will need to change to a spoon to get everything blended.
5. Roll dough into one-inch balls and place in mini-tins. Press in and up the sides with your finger.
6. Bake for roughly 11 minutes. Use rest of dough in larger tin, or if you have two mini-tins. (bake larger for 11 minutes also)
7. Take out of oven; use a round tablespoon or normal spoon and press the cookie down to make circles.
8. Let cool before using the spoon to gently wiggle cookie out. Place on cooling rack.
9. Make jelly. Carefully use a small spoon to pour hot liquid jelly into cookies.
10. Refrigerate cookies for 3 hours to overnight.
11. Enjoy – and remember they are fragile, one-bite wonders!

I love these – like a cookie version of one if my favorite things!
I know – my two favorite things also! And I didn’t even know today with National PB&J Day! What a great celebration!
Oh wow, these are interesting and I think the jelly will lessen the richness of the PB. I must pin 😉
Very fun idea!
Thanks for linking up at our Gluten Free Fridays party! I have tweeted and pinned your entry to our Gluten Free Fridays board on Pinterest! 🙂
Can’t wait to see what you link up this week! The party link up is open!
Cindy